How to Set Up and Implement Cookiebot by Usercentrics

Whether you’re looking to keep your personal website compliant, a small to medium business, or even an enterprise website, Cookiebot CMP is the first choice for an easy-to-use, fully customisable cookie banner and consent management platform.
The Cookiebot admin interface and manager is available in six languages (English, French, German, Italian, Spanish, and Danish), and the Cookie Banner and Declarations are available in 46 different languages.
If you need help setting up Cookiebot, you can contact us for a full setup using our Cookiebot CMP setup service.
Getting started
There are currently 3 different ways to jump into Cookiebot:
- Onboarding: A guided walkthrough available in the new Admin Interface (Recommended)
- Admin Interface: The new streamlined interface that’s focused on being as user-friendly as possible
- Cookiebot Manager: The classic powerful interface
If you’re using a trial account or if this is your first time setting up a CMP we recommend using the Onboarding process to get started.
Accidentally closed the Onboarding and want to re-open? Don’t worry. It’s available at admin.cookiebot.com/onboarding
Getting started: onboarding
Once you log-in to your account, you’ll be presented with an onboarding walkthrough. We recommend completing this before exploring further.
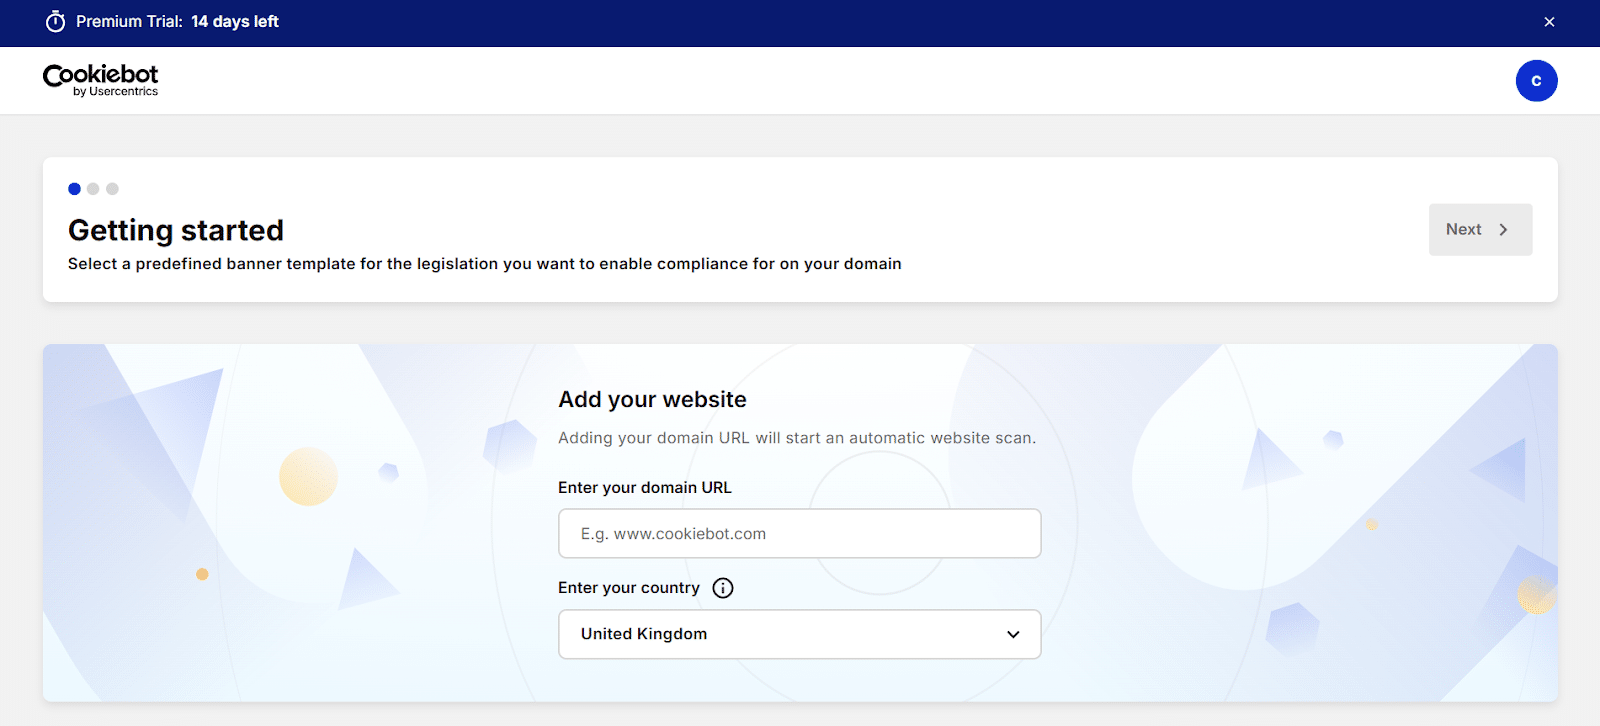
If you’re testing out the 14 day free trial, you’re limited to a single domain. Please note that sub-domains count as separate domains, so won’t be included (app.example.com would be a separate domain to example.com).
Once you enter your domain (your website’s address, eg. mywebsite.com) an automatic scan will begin to detect your existing set-up and cookies. A detailed report will be delivered to your inbox within 24 hours.
Important! Don’t add the http:// or https:// part. The www. part is optional.
We recommend choosing the GDPR template for setting up your trial account, only choosing another legislation preset if your website users are only going to be in that location.
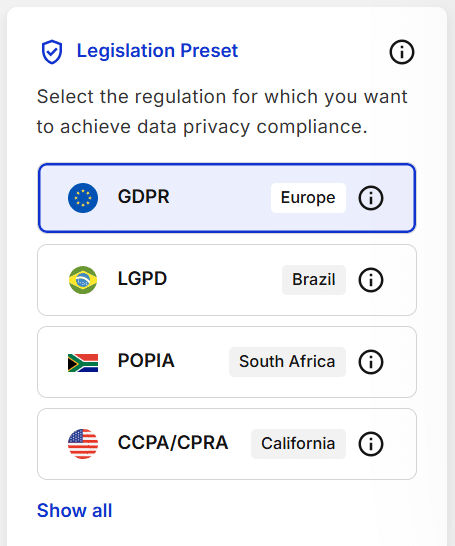
You can add other presets later on with Domain Groups. Cookiebot premium can automatically adjust your consent banner depending on where your website user is visiting from. Pretty nifty.
Next up, you can customise the look and content of your consent banner. Feel free to have a play around here and see what’s possible, but we recommend re-applying the preset before continuing. There are important regulations that include visual design, so make sure you’re confident of any changes you make.
The next step is implementation. You can do this manually or by using Cookiebot’s integrations, such as with WordPress, Squarespace, or Google Tag Manager. Cookiebot has easy-to-follow step-by-step guides available for installing Cookiebot CMP on your website. Check out their implementation guides to learn more.
Getting started: Admin Interface
It’s also possible to skip the walkthrough and get started straight in the Admin Interface.
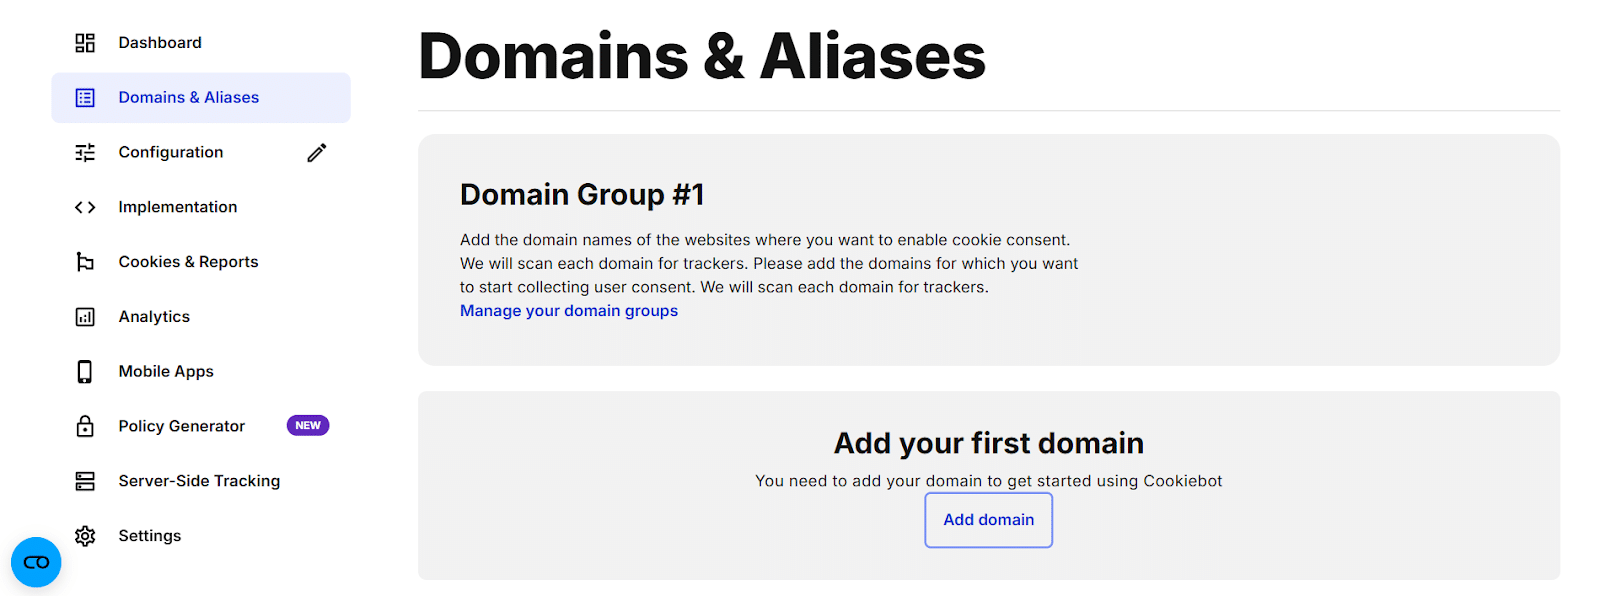
Head to Domains and Aliases, then click Add Domain
Once you enter your domain (your website’s address, eg. mywebsite.com) an automatic scan will begin to detect your existing set-up and cookies. A detailed report will be delivered to your inbox within 24 hours.
Important! Don’t add the http:// or https:// part. The www. part is optional.
Next, go to Configuration and you’ll see the options available for your cookie consent banner. There’s quite a lot of customisation available, but we recommend going with the defaults. There’s important legislation that includes visual design, so make sure to do some research before committing to any changes.
We also recommend choosing the GDPR preset for now, only choosing another legislation preset if the users of your website are only going to be in that location.

You can set up multiple regional regulations later on by creating Domain Groups.
The next step is implementation. You can do this manually or by using one of Cookiebot’s integrations, such as with WordPress, Squarespace, or Google Tag Manager. Cookiebot has easy-to-follow step-by-step guides available for installing Cookiebot CMP on your website. Check out their implementation guides to learn more.
Getting started: Manager
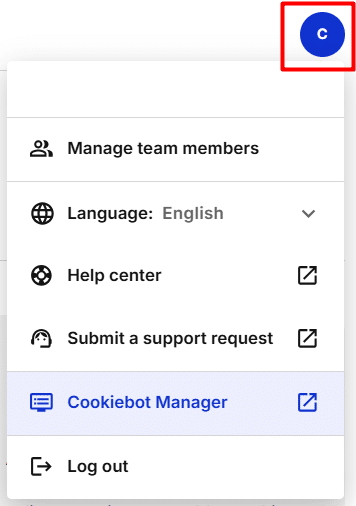
As Cookiebot is currently in the process of releasing the full Admin Interface, an extra step is required to get to the manager. From your admin.cookiebot.com dashboard, click on your profile icon at the top right, then choose Cookiebot Manager. From there a single button click will link your account to the Manager and you’ll receive an email with login details.
Congratulations! You now have the full power of Cookiebot at your control.
Using the Manager to get started is a simple two step process:
- Add your domain
Click the green button next to Domain Name, highlighted in the image below
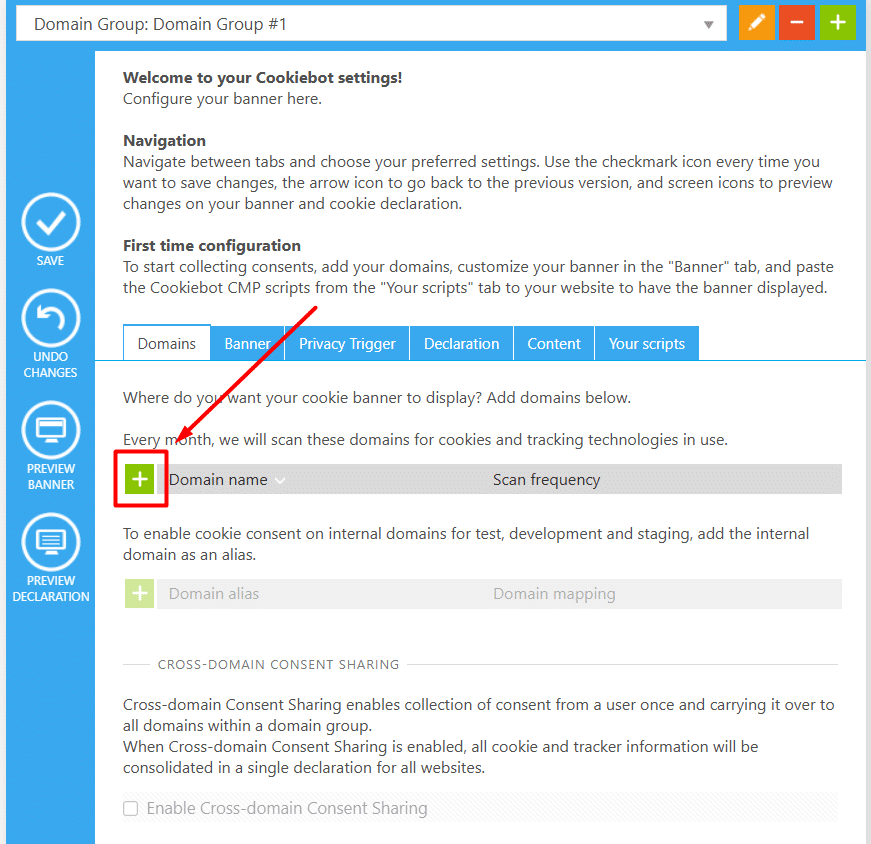
Once you enter your domain (your website’s address, eg. mywebsite.com) an automatic scan will begin to detect your existing set-up and cookies. A detailed report will be delivered to your inbox within 24 hours.
Important! Don’t add the http:// or https:// part. The www. part is optional.
- Design your Cookie Banner and Privacy Trigger
Switch tabs on the section highlighted below to customise the look and content of your Cookie Banner, as well as the Privacy Trigger.
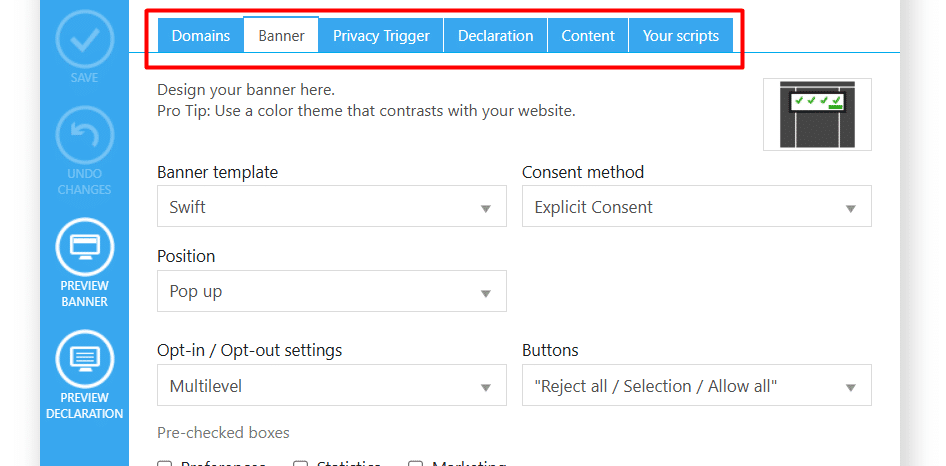
You can preview changes by clicking on the buttons in the blue section on the left. However, we recommend that you leave everything with the default (strictest) settings. There are important rules that include visual design, so only click “save” if you’re confident every change is compliant.
That was more like one step. Next up: implementation. You can do this manually or by using one of Cookiebot’s easy-to-use integrations, such as with WordPress, Squarespace, or Google Tag Manager. Check out their implementation guides to learn more.
Implementation
Cookiebot has 20 different integrations (at time of writing). From Adobe Dynamic Tag to Wix, you’re highly likely to find an easy way to install Cookiebot CMP.
Their full list of easy-to-follow step-by-step implementation guides are available here, including WordPress, Google Tag Manager, and Manual Implementations.
Implementing Google Consent Mode with Cookiebot
If you use Google Tag Manager, you should know how important Consent Mode is. It’s Google’s framework for legal compliance, so ensuring that you’ve set it up correctly is essential to avoid massive potential fines for breaking laws like GDPR and CCPA.
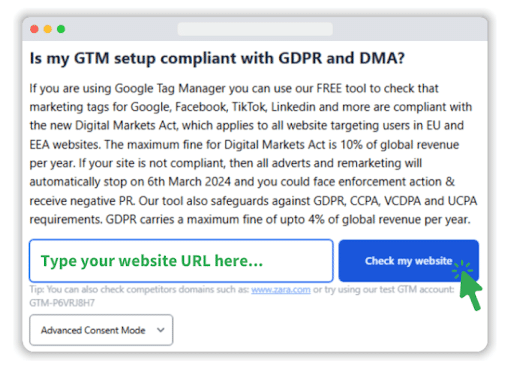
MeasureMinds have also created a free tool, Consent Mode Monitor, which helps you to ensure that your Google Tag Manager consent mode is set up correctly. CMPs do a lot to keep you compliant, but there are potential gaps that can be missed when it comes to GTM. Consent Mode Monitor has a unique scanning process that allows you to audit your compliance container-side. Use Consent Mode Monitor now to ensure you’re not breaking legal regulations like GDPR and CCPA.
To implement consent mode with Cookiebot CMP, follow these steps.
WordPress
- If you’re using the Cookiebot CMP WordPress plugin, go to Settings, then Google Consent Mode.
- Ensure that “Google Consent Mode enabled” is toggled on.
Google Tag Manager
Using the Cookiebot CMP template tag from the template gallery, ensure the “Enable Google Consent Mode” box is checked.
Important! Make sure that the tag is assigned the “Consent Initialization – All pages” trigger.
Manual Implementation
If you have installed the Cookiebot CMP tag directly on your site, you can set default (prior consent) settings via the Google consent API-integration by adding the following code to your website.
Add this script to your header, ensuring it precedes any Google Tag Manager scripts.
<script data-cookieconsent="ignore">

    window.dataLayer = window.dataLayer || [];

    function gtag() {

        dataLayer.push(arguments);

    }

    gtag('consent', 'default', {

        'ad_personalization': 'denied',

        'ad_storage': 'denied',

        'ad_user_data': 'denied',

        'analytics_storage': 'denied',

        'functionality_storage': 'denied',

        'personalization_storage': 'denied',

        'security_storage': 'granted',

        'wait_for_update': 500,

    });

    gtag("set", "ads_data_redaction", true);

    gtag("set", "url_passthrough", false);

</script>
See this full article from Cookiebot for more information.
Cookiebot CMP best practices
No matter your method of implementation, these are the general rules you should always follow to ensure both legal compliance and unexpected behaviours.
Load Cookiebot CMP first
Never deploy tags before getting user consent. You must load Cookiebot CMP before loading any website elements.
Avoid bundles
If a single resource consists of both critical and optional scripts in a bundle, it will need consent to load.
This can easily lead to critical parts of your website breaking if consent isn’t given.
Be careful with speed optimisers
If you’re using a plugin to optimise speed for your website, make sure that it’s not touching your CMP.
Any attempt to change the way it loads can easily break consent mode and leave you non-compliant.
Visit the Cookiebot CMP help centre
Check out the Cookiebot CMP help centre for a library of useful guides and instructions.
Get in touch with MeasureMinds
Still unsure? Get in touch with us at MeasureMinds. We’ve partnered with Cookiebot CMP to bring you the best CMP choice, backed by our expert knowledge. We can also offer you a 20% lifetime discount, so contact us today.
Cookiebot FAQs
How much does Cookiebot cost?
Cookiebot has a free option for smaller sites, or premium options from as little as $8/€7/£6 a month. MeasureMinds can also give you a 20% lifetime discount, further reducing the cost.
Can I use Cookiebot for free?
Absolutely. Cookiebot has a free option for smaller sites, and MeasureMinds can offer you a 14 day free trial of Cookiebot Premium, with a 20% lifetime discount if you decide to upgrade.
Is Cookiebot legit?
Yes, Cookiebot has been a leading Consent Management Platform provider since 2012. It’s fully compliant with all legal frameworks, such as GDPR and CCPA, and has the highest customer retention rates in the industry.
Where does Cookiebot store data?
Data is stored and processed in secure Microsoft Azure datacenters to the highest industry standards. Read more about Microsoft Azure here.
- Enterprise SaaS SEO – Expert Strategies, Tools, & Playbooks - 31/03/2026
- How to Set Up and Implement Cookiebot by Usercentrics - 18/03/2026
- Top 5 OneTrust Alternatives for 2026 - 12/03/2026