Enhanced Conversions & Consent Mode: How They Work

Google has recently added two new features to Google Analytics: Enhanced Conversions and Consent Mode. These powerful tools are used to ensure compliance and improve reporting. Used incorrectly, though, they can hinder performance and lower your return on ad spend.
It’s important to fully understand Enhanced Conversions and Consent Mode, how to set them up, and get the most out of these new Google Analytics features.
We’re going to get straight into how to setup and use enhanced conversion and consent mode but if you’re looking for more information about what they are and the benfits of using them, please skip to the end of the article.
Setting up Enhanced Conversions Consent Mode for Google Ads
Together Conversions and Consent Mode are powerful tools for your advertising. But how can you make the most of them? Here’s a step-by-step guide for setting up Enhanced Conversions and using Consent Mode for Google Ads.
Setting up Enhanced Conversions
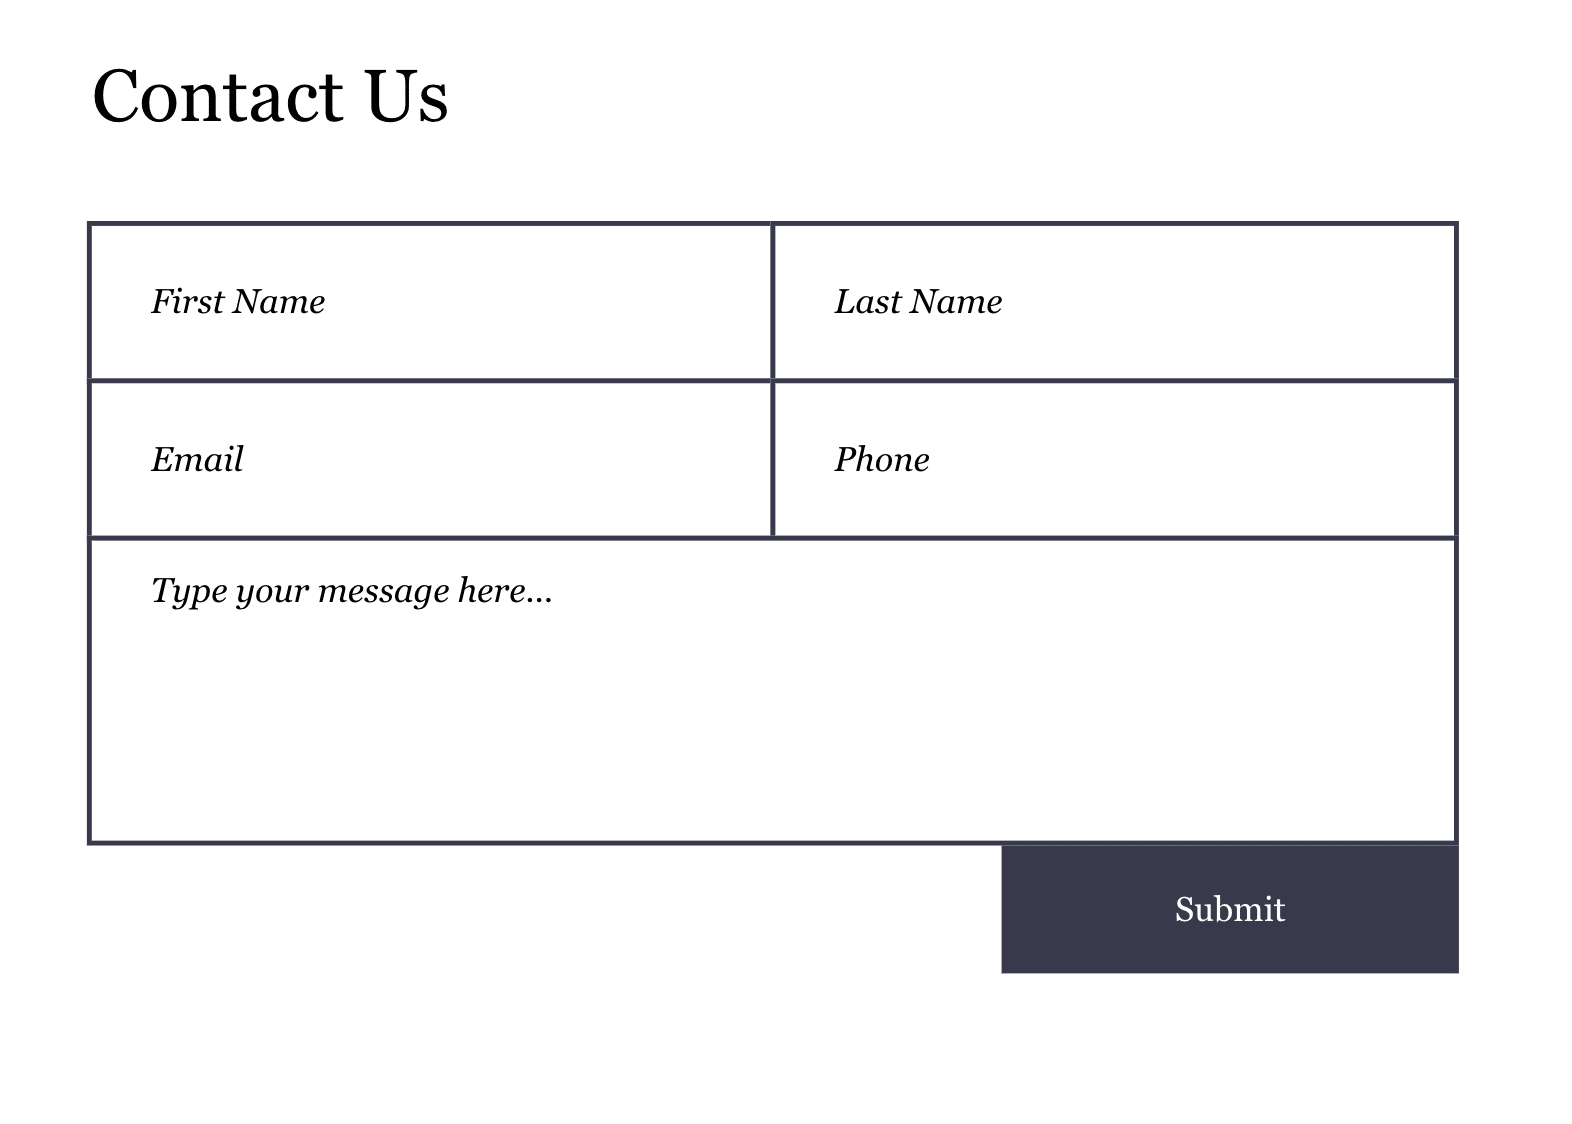
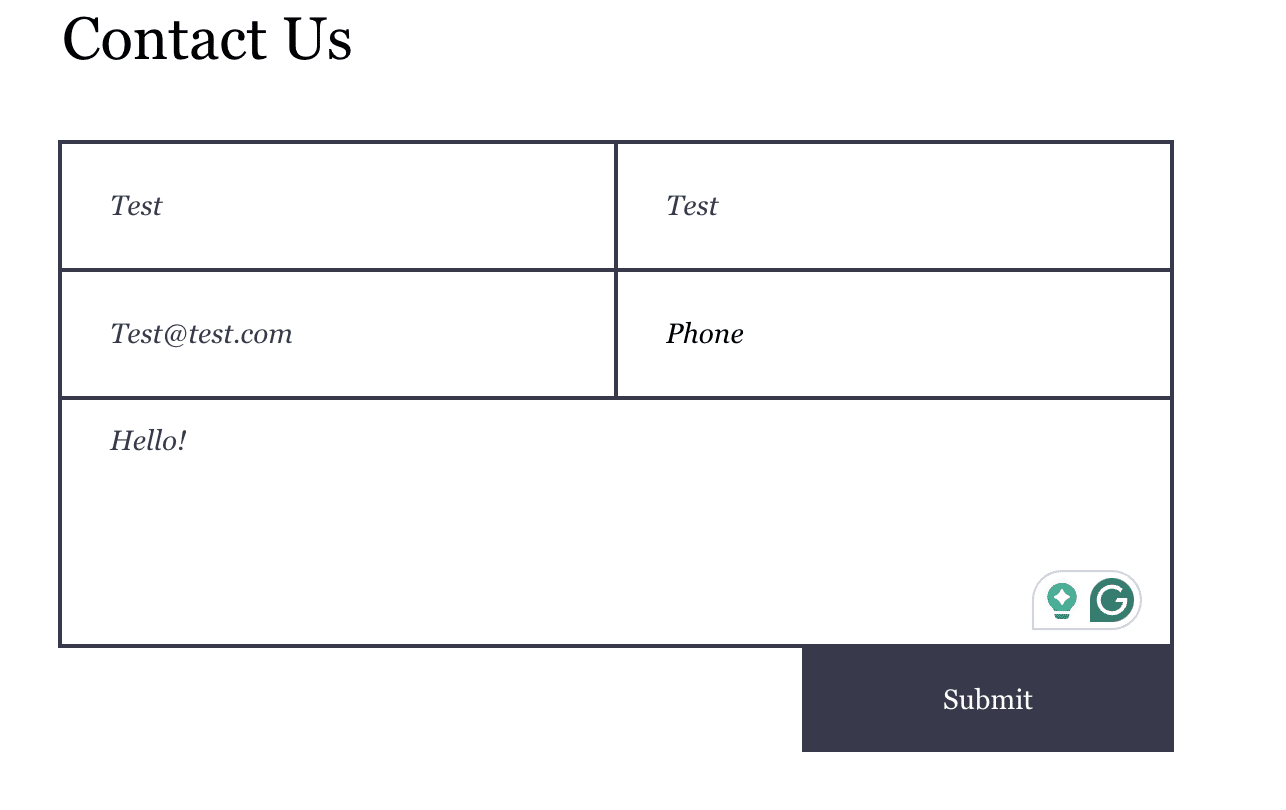
Firstly, you’ll need to decide which element of your site you’d like to track with enhanced conversions. For this example, we’ll track a form in WordPress.
For Enhanced Conversion to work, we need to send email addresses entered into this form to Google Ads. Of course, we can also send other information, such as phone numbers or names.
Adding form-tracking plugins
Step 1
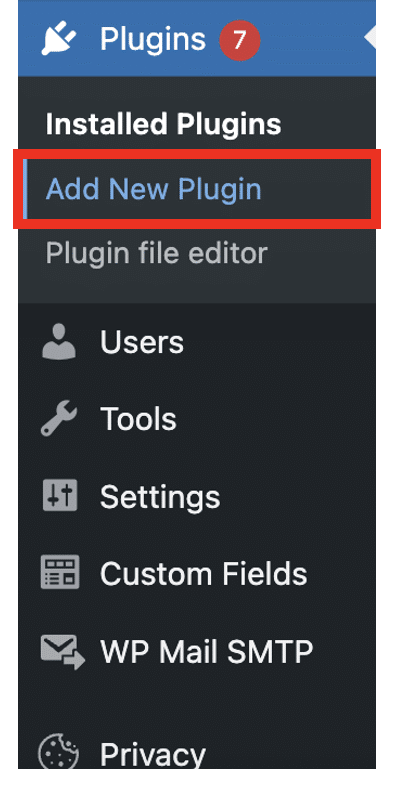
Navigate to the ‘Add New Plugin’ section on WordPress, which can be found within ‘Plugins’.
Step 2
From the plugin store, search for two plugins ‘Contact Form 7’ and ‘GTM4WP’. Select ‘Install now’ once you locate the correct plugins from the list.

Step 3
Once the plugins are installed, you can head to ‘Installed Plugins’.

Step 4
Find the new plugins from the list and choose ‘activate’, then choose ‘Settings’.

Step 5
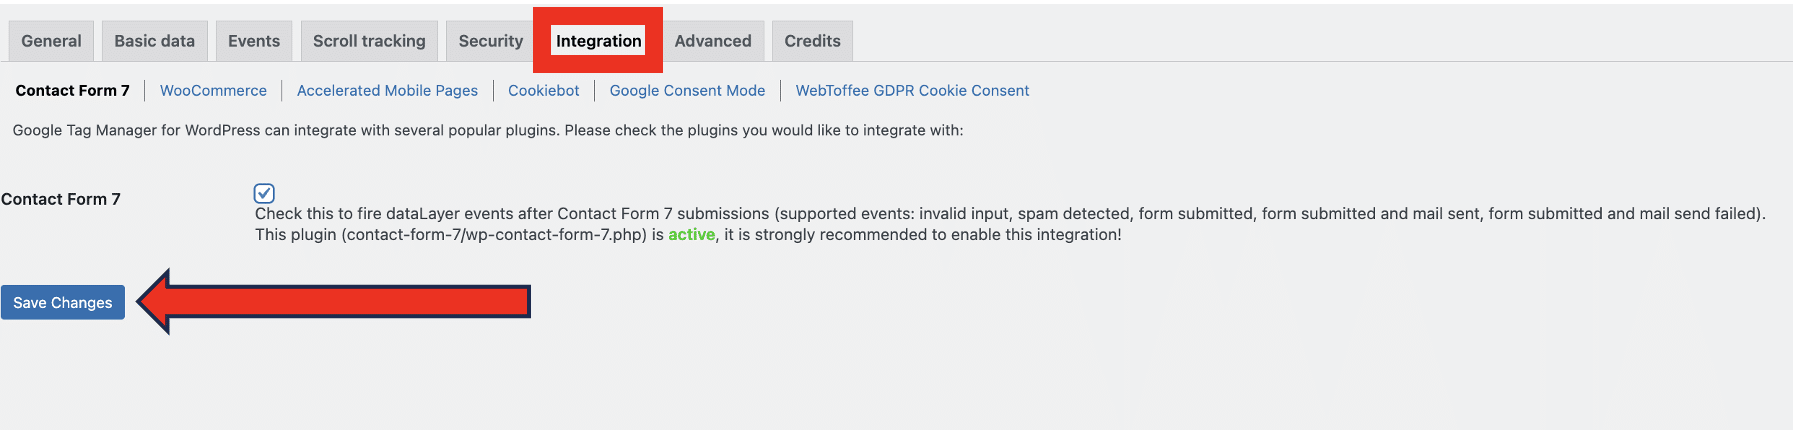
From within the settings menu, select ‘integrations’ from the top menu. Then, look for a field labeled ‘Contact Form 7’. Enable this option to push events to the dataLayer. This pushes events when a form sends an email and when it is submitted.
Once you’ve selected this option, choose ‘Save Changes’.
Step 6
For the second part of this process, you’ll need to set up Google Tag Manager. Make sure you’ve followed this step before proceeding.
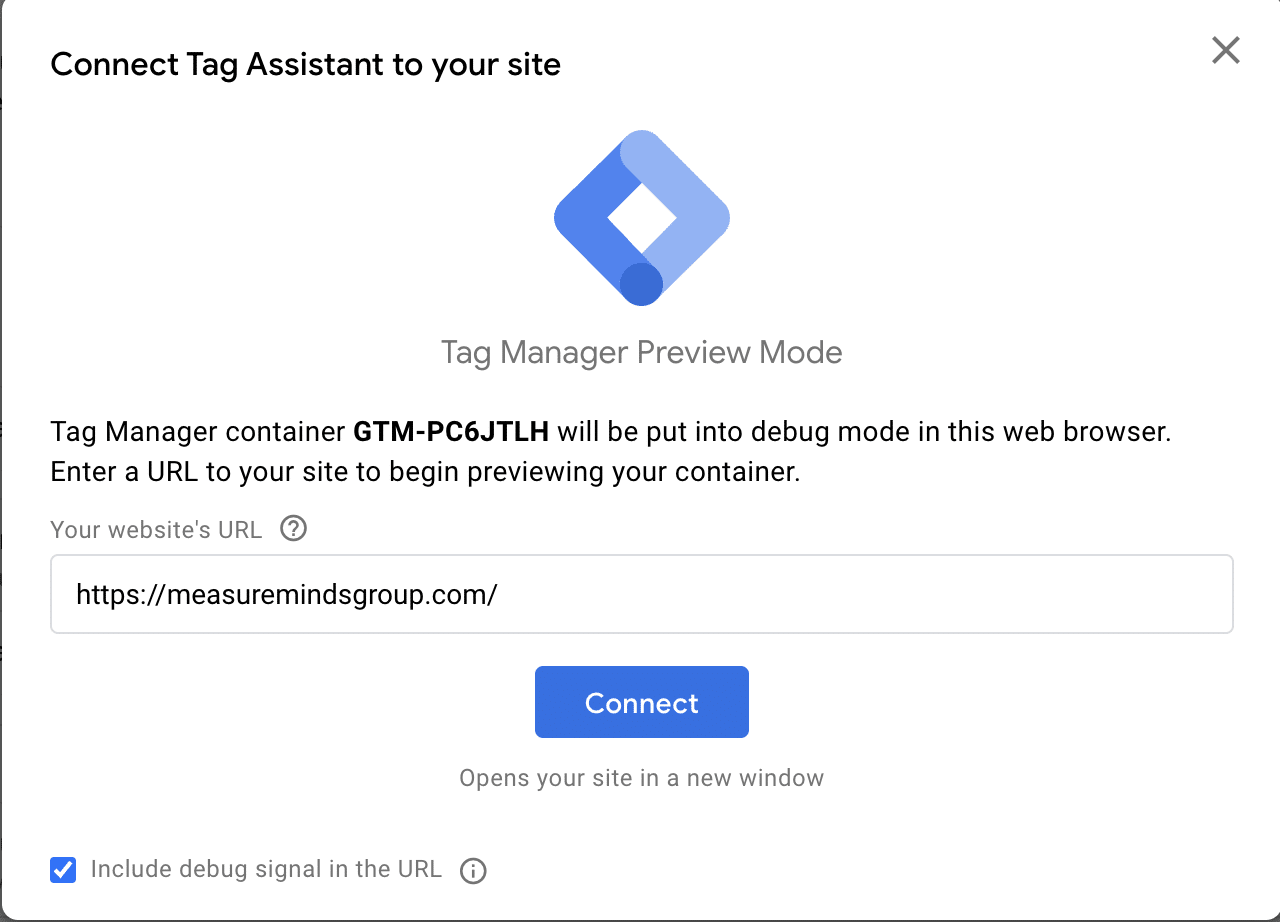
From within GTM, head to preview mode. To do so, choose ‘Preview’ from the top of your workspace.

Step 7
You’ll be asked to enter the URL of your website. Once this is done, hit ‘Connect’.
Step 8
Now navigate to the form, enter some details, and hit submit.
Setting up variables
Step 1
When you return to the tag assistant tag, you should see new events being pushed to the data layer. Use the submission event to configure tags, triggers, and variables in GTM. To do so, select it from the list.
Step 2
You should now see an event called ‘gtm4wp.contactForm7Submitted’. Copy this – we’ll need it later. From the ‘inputs’ tab, you should also see the email address that was entered into the form. You’ll use this for the configuration.
Step 3
Now, let’s head to the ‘variables’ tab within GTM. From here, we’ll create a user-defined variable.
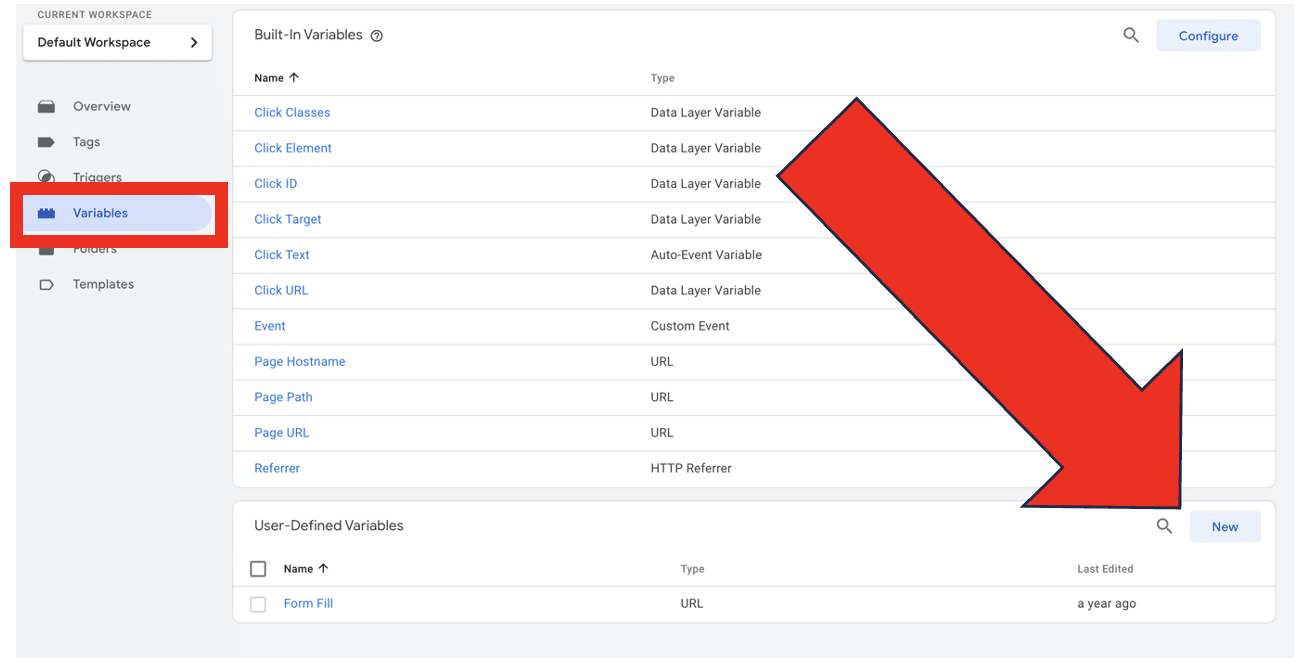
Step 4
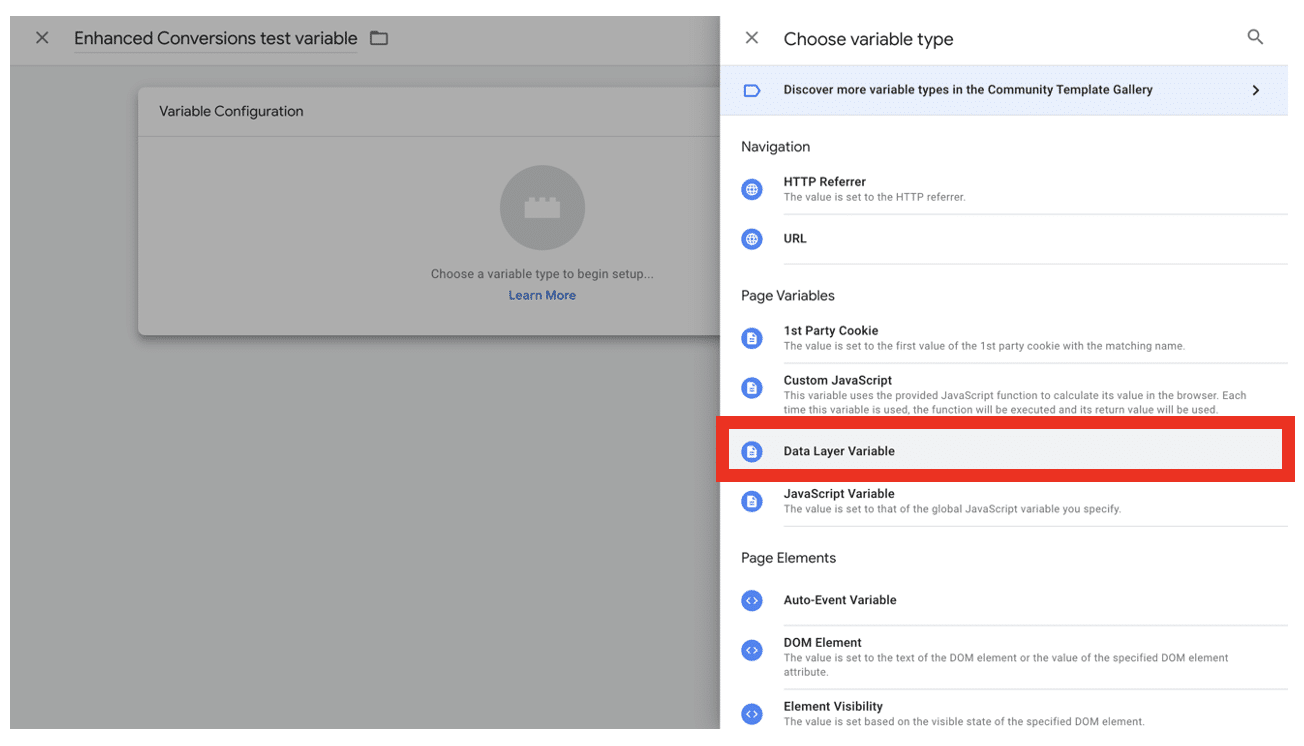
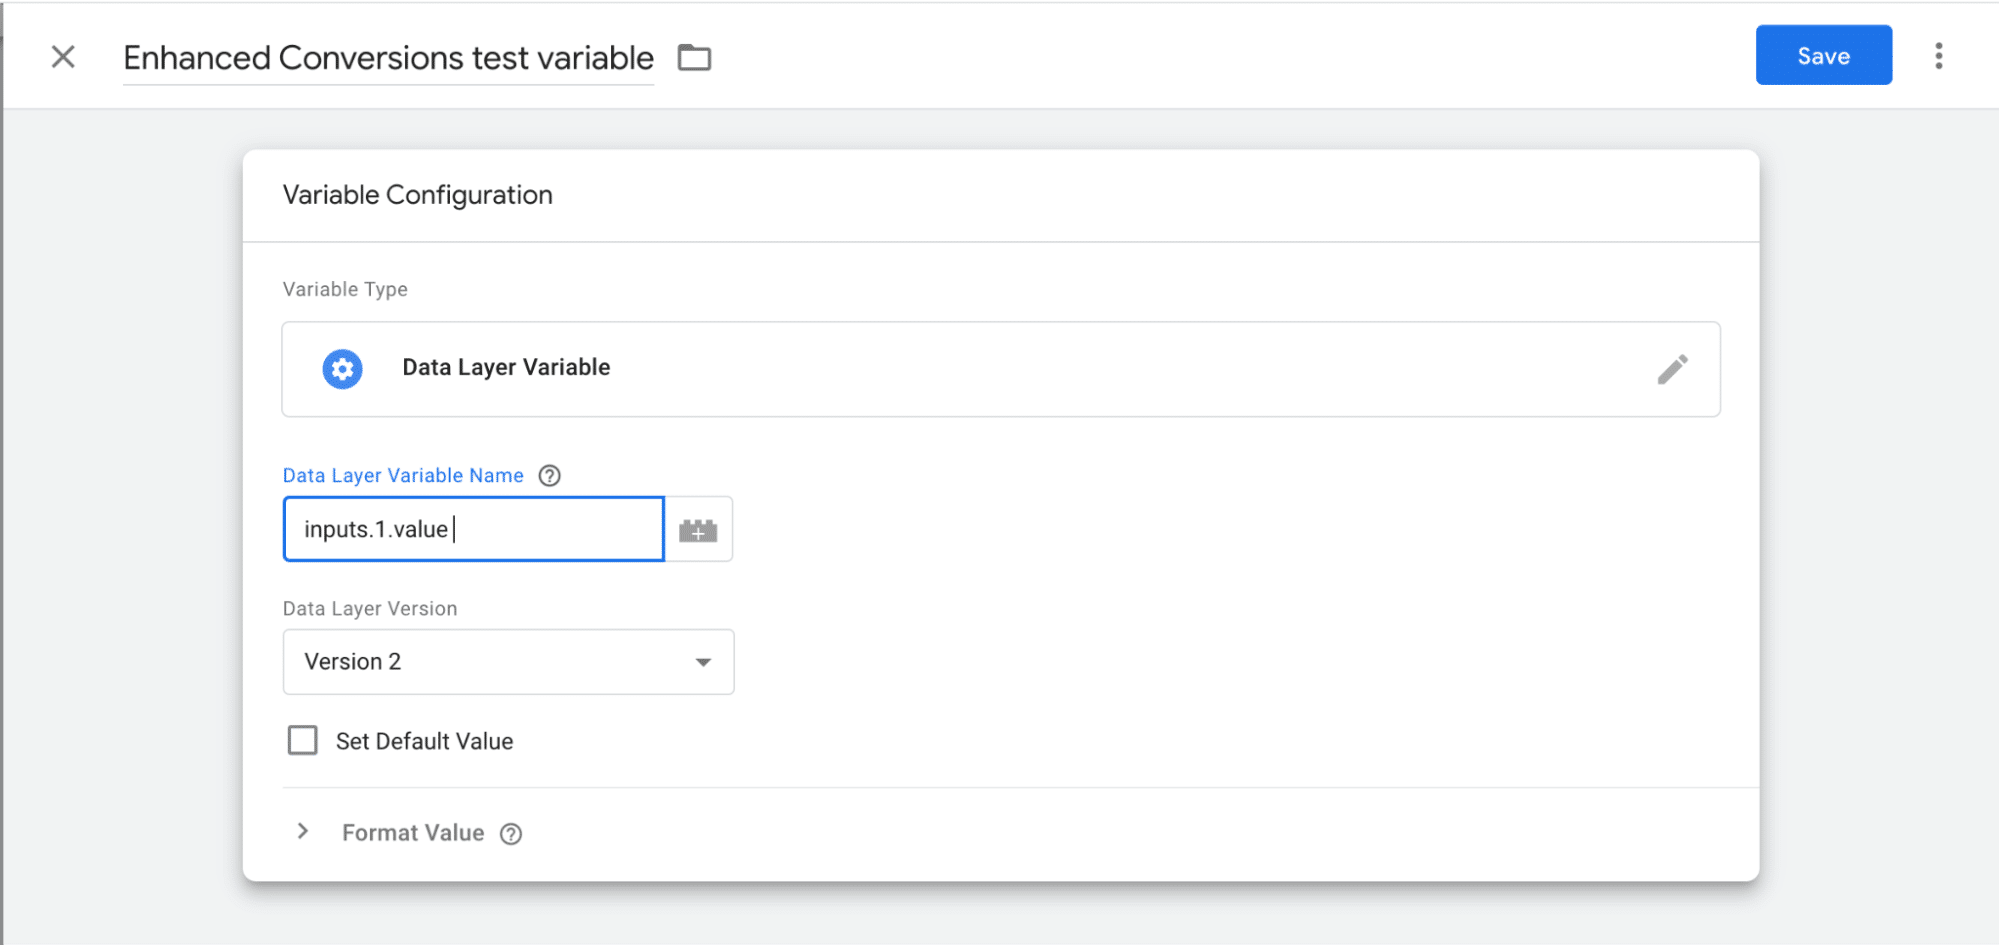
Name your variable and then begin configuration. Choose ‘Data layer variable’, which is located under ‘Page Variables’. Choose ‘inputs.1.value’ and then hit ‘Save’.
Step 5
Now, create a second user-defined variable. Once again, name your variable, and this time choose ‘User provided data’.
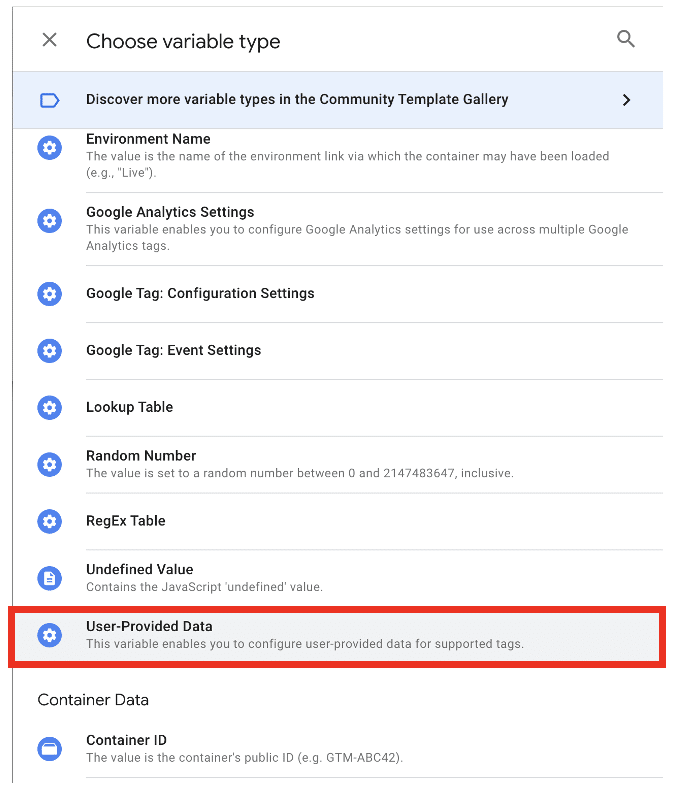
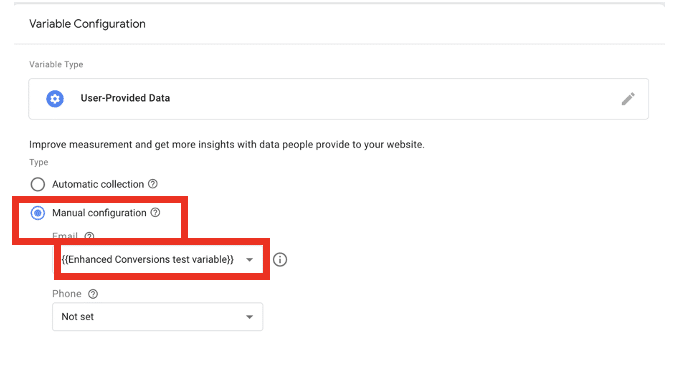
Step 6
You’ll now be taken to another configuration page. From here, select ‘Manual configuration’. Under email, select the variable we have just created. Finally, choose save.
Setting up triggers
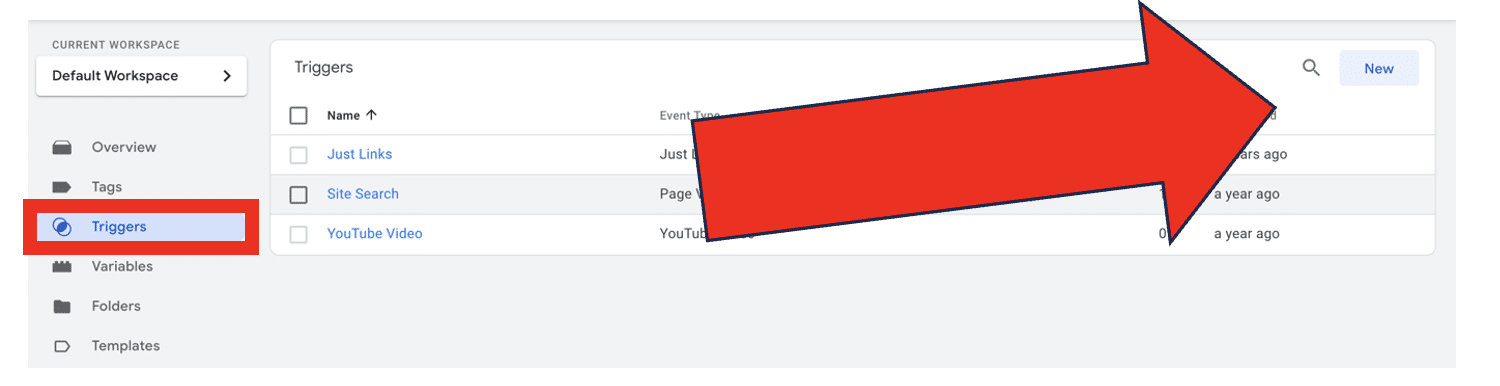
Step 1
The next stage of setting up Enhanced Conversions involves creating triggers. To do so, navigate to the ‘Triggers’ section from your toolbar. Next, choose ‘New’.
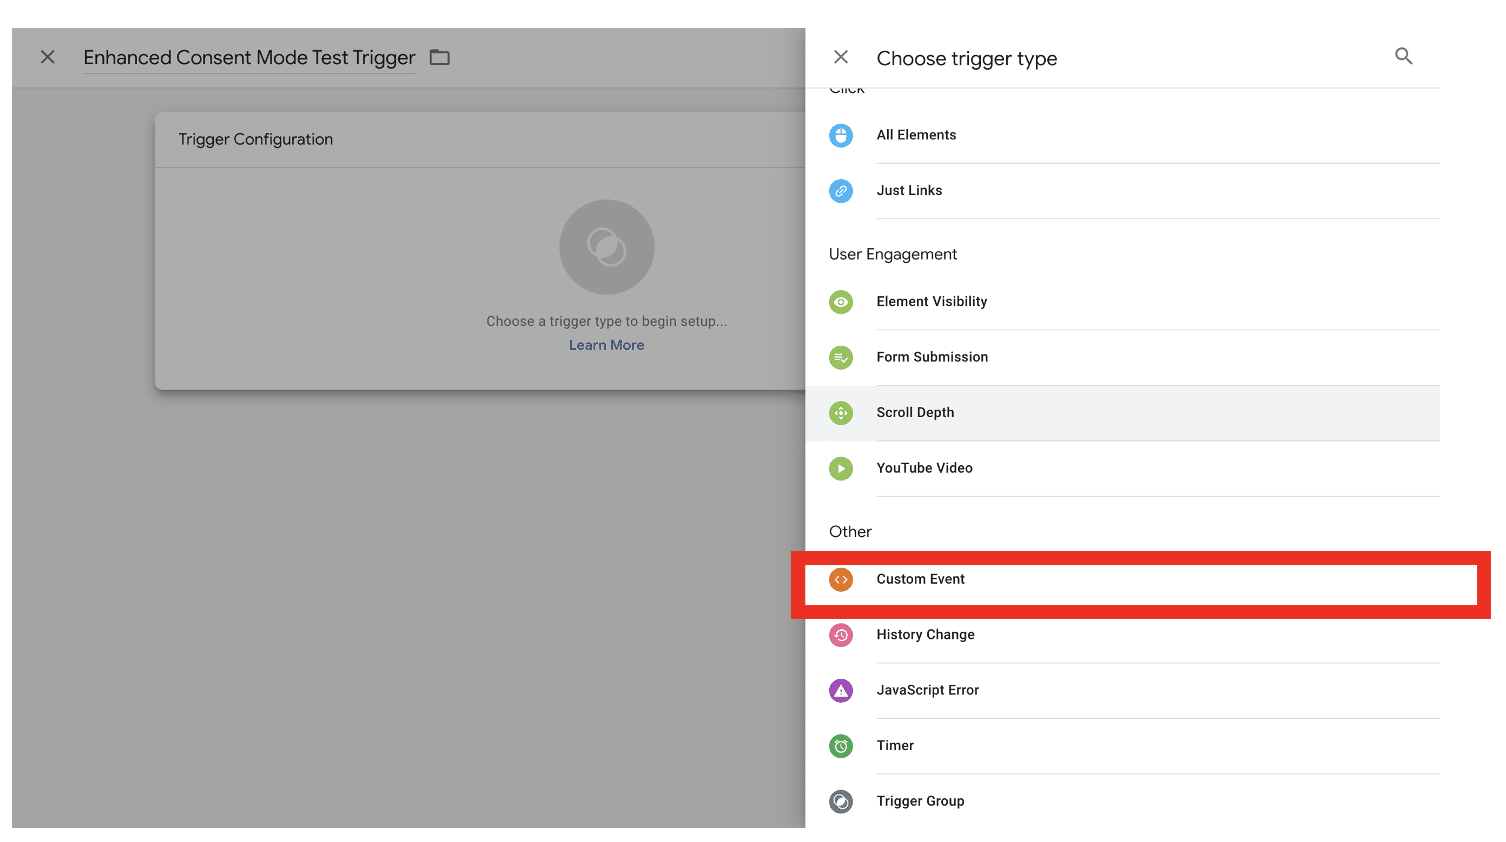
Step 2
Name the trigger and then choose ‘Trigger configuration’. Scroll down the list of trigger types until you find ‘Custom Event’.
Step 3
Under ‘Event name’ paste the data layer that you copied earlier. Then, save the trigger.

Creating a tag
Step 1
With tags, triggers, and variables set up, it’s time to create a tag that will send data to your Google Ads account.
Navigate to ‘Tags’ and create a new tag.
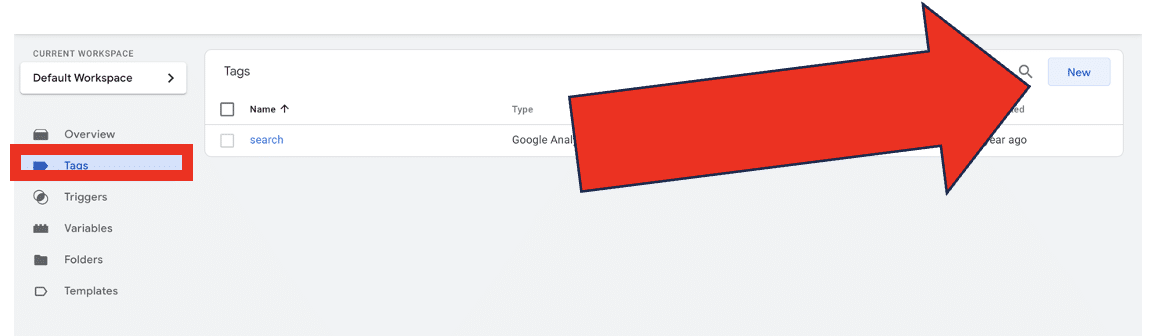
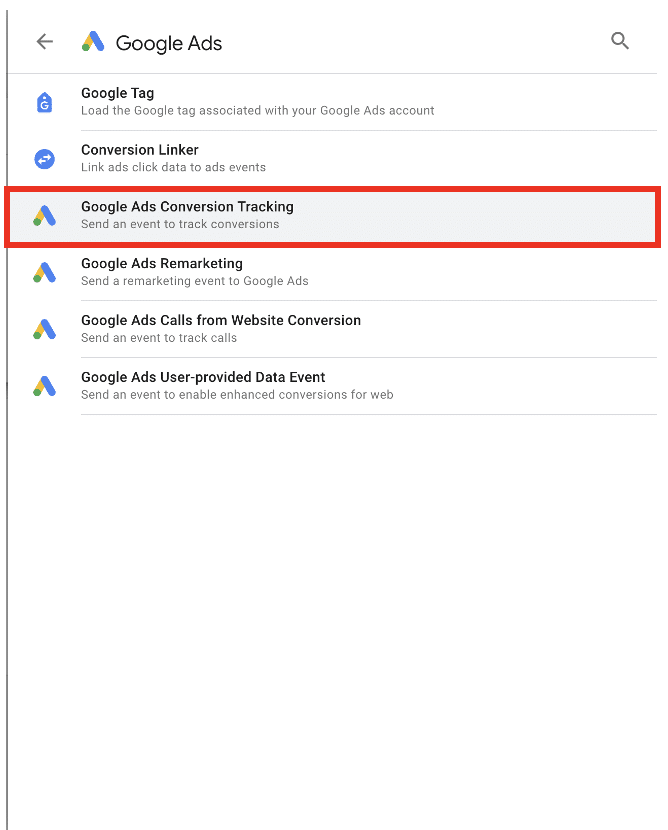
Step 2
Name your tag and choose ‘Tag Configuration’. Then, select ‘Google Ads’ and finally, ‘Choose Google Ads Conversion Tracking’.

Step 3
Now you need to add a conversion ID and conversion label. You can find these within Google Ads.
Step 4
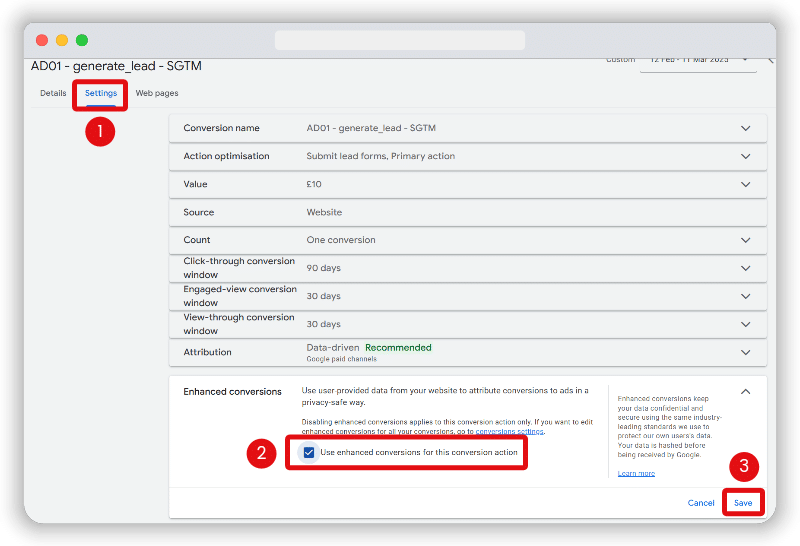
From inside Google Ads, head to ‘Goals’. Then, choose ‘Conversions’ and ‘Summary’.

Step 5
From the conversion action list, choose the lead generation conversion action.

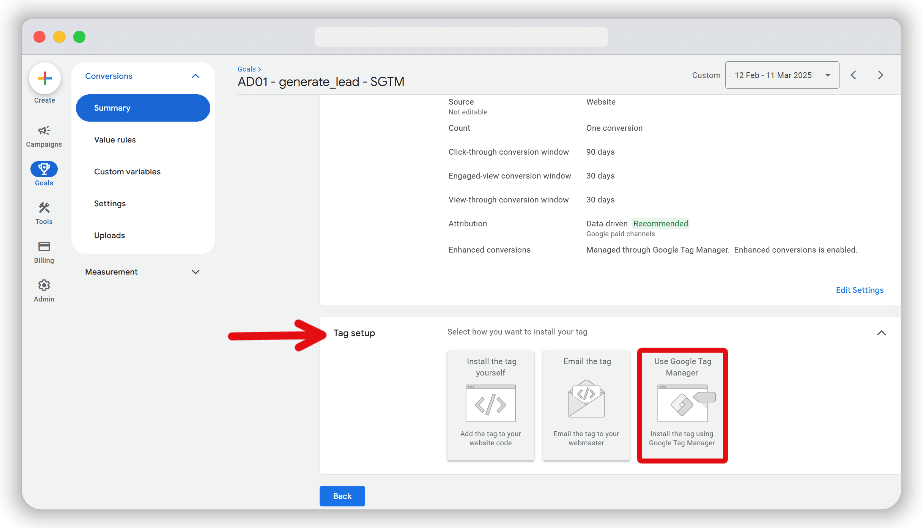
Step 6
Now, choose ‘Tag setup’ and ‘Use Google Tag Manager’.
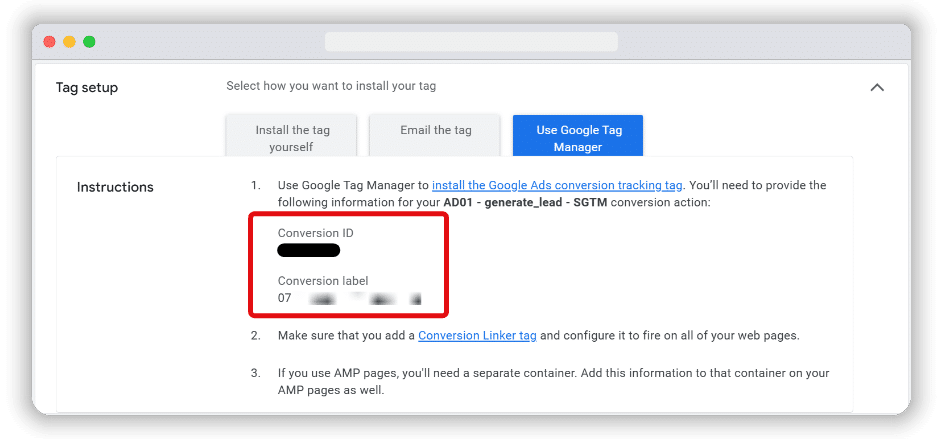
Step 7
Copy the conversion ID and conversion label.
Lastly, Go to the Settings tab, then scroll down to ‘Enhanced Conversions’ and check ‘Use enhanced conversions for this conversion action’.
Step 8
Head back to Google Tag Manager and paste the conversion ID and then the conversion label.
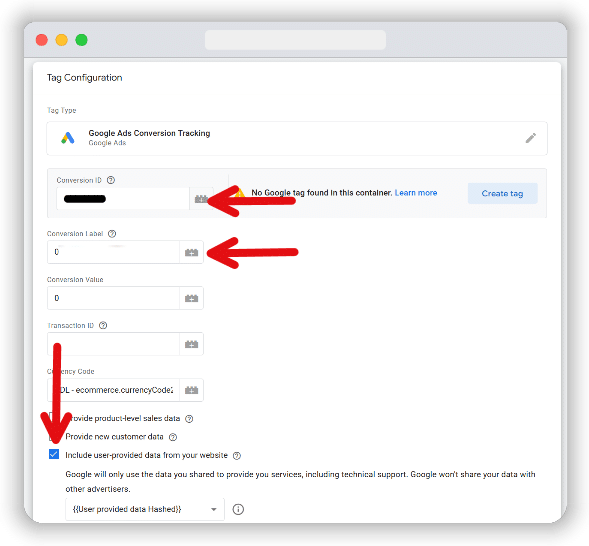
For Enhanced Conversions Consent Mode to work, you also need to choose ‘Include user-provided data from your website’, and then choose your custom variable.
Step 9
Next, you need to scroll down to Triggering and select your custom trigger. You can then save the tag.
Using Consent Mode
Step 1: Checking the consent overview
Now it’s time to set up Consent Mode to make sure Enhanced Conversions is being used in a compliant way. We’ll assume that you’ve already set up a consent management platform and cookie banner on your site. If so, it should appear in your list of tags.
Head to the consent overview section, which is identified by the shield icon, located in the top right of the tags section.
Step 2: Recently created tag inspection
The consent overview section will display all the tags within a GTM container. You’ll see that your recently created tag is currently found in the ‘Consent Not Configured’ section. Click the tag to configure consent settings.
Step 3: Verify built-in consent checks
The tag already has three built-in consent checks: ad_storage, ad_personalization, and ad_user_data. This means the conversion tag will adapt based on consent mode. You can choose ‘No additional consent required’ and select save.
And there you have it. You’ve successfully set up Enhanced Conversions Consent Mode.
What is Google Consent Mode?
Google Consent Mode helps businesses continue data collection activities in compliance with data and user privacy legislations. It was created in response to data laws such as GDPR, the DMA, and others.
When a user arrives on your landing page, Consent Mode uses a ‘default consent’ setting. This prevents any user tracking from taking place, disabling nonessential cookies. Your consent banner then gathers user consent choices and sends signals to Consent Mode. This will alter the behavior of cookies on your site.
If a user consents, cookies and tags are activated on your site in line with a user’s choices. If they deny consent, tags continue to be deactivated. The tool provides dynamic consent, so if a user wishes to update their choices, it will reconfigure tags.
Consent Mode is also capable of ‘modelling’ data for users who deny cookies. It uses data from consenting users to upscale and fill the data gap. Consent Mode modelling is particularly useful for benchmarking, allowing users to create accurate comparisons over time.
To make sure you’re using Consent Mode correctly, you can use our Consent Mode Monitor. This scans your site and produces a list of tags with missing or incorrect consent.
The benefits of Consent Mode
There are several reasons why using Consent Mode is in your business’s interest, including:
- Compliance with legislation – Compliance is a growing issue for businesses. Consent Mode can help you avoid costly fines and other impacts of breaching legislation.
- Maintain a flow of customer data – Without the ability to gather consent, you’d need to disable all cookies on your site. Consent Mode enables you to continue to gain valuable data in a compliant way.
- Upscaling – As mentioned, Consent Mode conversion modelling enables you to bridge the data gap for users who don’t consent. You gain more accurate reports, which can be used to optimize your site.
What is Enhanced Conversions?
Enhanced Conversions is designed to improve the data that businesses receive from ads, helping with conversion measurement. In particular, it’s designed to improve insights when limited information is available.
As with Consent Mode, Enhanced Conversions was designed as a response to changes in privacy regulations. These prompted Google to depreciate third party cookies from Google Chrome. This was bad news for tools such as Google Analytics, which relied on these cookies.
Enhanced Conversions uses the Google Privacy Sandbox, which collects subsets of user data without the need for third-party cookies.
The benefits of Enhanced Conversions
As with Consent Mode, Enhanced Conversions brings many benefits, such as:
- Increased accuracy for conversions – Thanks to Consent Mode, we can track user interactions more accurately. According to Google, conversions on search received a 5% increase while conversion rates on YouTube gained a 17% uplift. This accuracy means organisations can gauge the performance of their campaigns.
- Device reports – Website owners can learn when a user accesses their websites via multiple devices. This helps businesses optimise their websites for mobile users.
- Improved bid management – You can use enhanced-conversion data value-based bidding. This form of bidding is more efficient, enabling you to focus on the most valuable traffic.
Why is Enhanced Measurements important?
Data privacy issues aren’t going away, which is why Enhanced Measurements is an essential tool for collecting high-quality data. However, the tool must be used in a way that aligns with data privacy legislation. That’s why setting up Enhanced Conversions Consent Mode should be a top priority.
Follow the steps listed here and take your first steps on your journey to compliance. It only needs to be done once, and can save you from facing fines and other issues. So why not get it done today?