A Guide for Using Consent Mode V2 with Hubspot

Data privacy isn’t a topic that’s going away. With more and more data regulations emerging, now is a good time for your business to reassess its approach to consent. HubSpot Consent Mode V2 is a simple solution for those using the HubSpot CMS. Let’s explore Consent Mode in more detail.
What is Google Consent Mode V2?
Consent Mode V2 is an updated version of Google’s original Consent Mode. The tool allows websites hosted with HubSpot to alter cookie behavior in line with a user’s preferences.
To understand why this is important, let’s rewind a few years. In 2016, the European Union passed the General Data Protection Regulation (GDPR). This stipulated that businesses must gather specific permission before collecting data relating to EU users.
When active on your site, the tool will gather consent choices from your consent management platform (CMP). It will instruct how cookies behave on your site based on these preferences. This way, they could continue to collect user data in a compliant way and avoid measurement loss. It should be noted that Consent Mode requires a CMP to work.
Consent Mode V2 was a response to the Digital Markets Act (DMA), a new data privacy law. Google added two new consent fields to align with the legislation. These were:
- Ad_personalization = allow downstream remarketing usage.
- Ad_user_data = allows email or mobile numbers in downstream usage.
You can use our Consent Mode Monitoring Tool If you’re unsure whether you have HubSpot Consent Mode V2 implemented on your site. The tool will analyse your consent setup and provide you with a list of tags with missing or incorrect consent.
Should you use HubSpot Consent Mode V2?
If you’re using a HubSpot-hosted website, then the simple answer is yes. Since March 2024, Google has begun requiring all websites and apps to use the tool.
If you don’t use Consent Mode, you’ll be cut off from key features in Google Ads. For instance, you won’t be able to use Google Analytics 4 audiences within your marketing. You’ll also lose access to remarketing lists for your campaigns.
In short, you’ll no longer be able to run effective sales or marketing campaigns. So, to avoid this fate, it’s best to activate Consent Mode now.
Integrating HubSpot with Google Consent Mode
There’s no denying that implementing the tool is essential, but where should you begin? There are two methods for integrating HubSpot with Consent Mode. Let’s explore both.
Integrating through HubSpot
Luckily, Google Consent Mode can be integrated with HubSpot in a few simple steps. To integrate, you’ll need to have fulfilled the following conditions:
- You must have a HubSpot-hosted website.
- You must have integrated your site with Google Tag Manager and GA4.
- You must set up the HubSpot consent banner.
Let’s quickly explore how you can fulfill each of these areas.
Integrating GA4 with HubSpot
We’ll assume that your HubSpot-hosted website is up and running and you’re ready for visitors. You may now need to integrate HubSpot with your GA4 ID.
Note: You’ll only need to integrate GA4 if you do not have website tracking set up with GTM. You’ll receive duplicate data if you’re tracking through both GA4 and GTM.
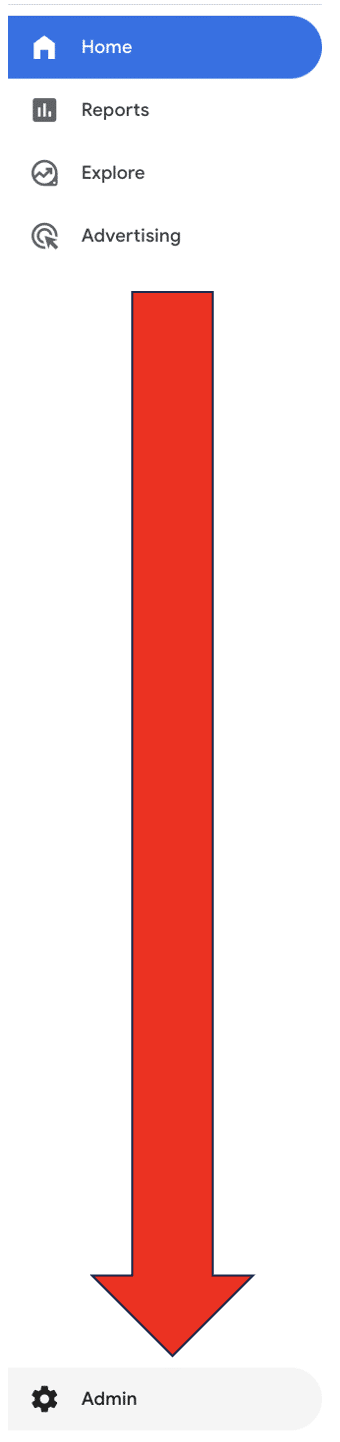
To find your GA4 measurement ID, head to the Admin tab within GA4. Go to the toolbar on the left of your screen and look for ‘Admin’ at the bottom.
Now, look for ‘Data collection and modification’ and choose ‘Data streams’.
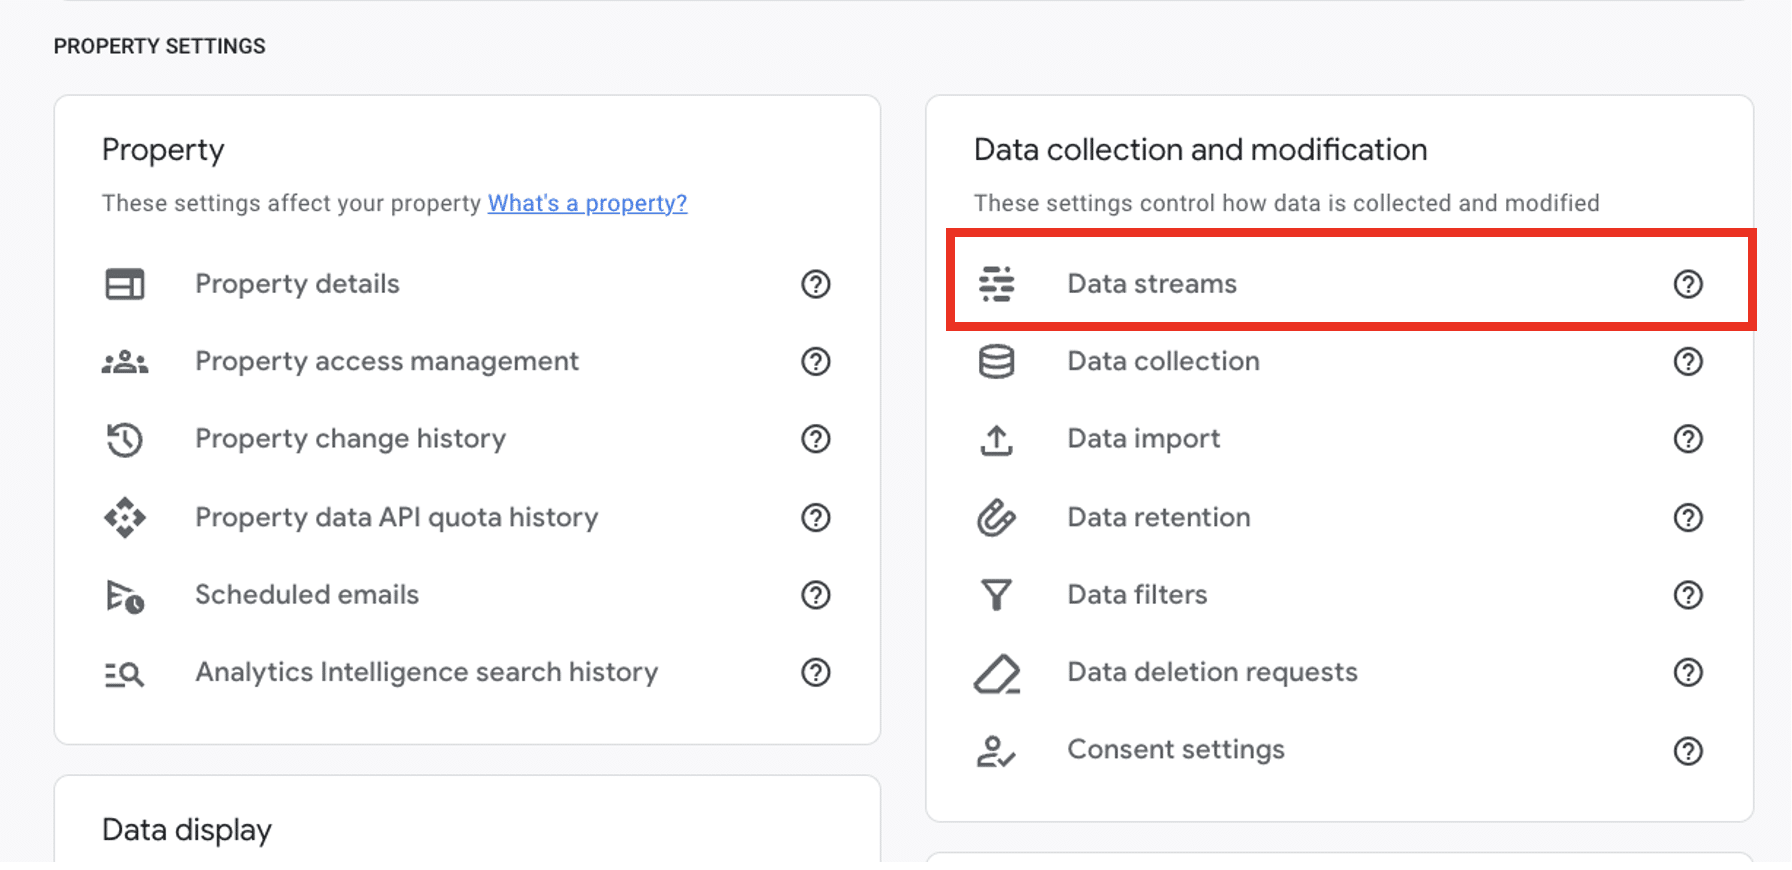
Select your website, then look for ‘Measurement ID’ from the following screen. You can copy the ID by selecting the two squares next to the ID.

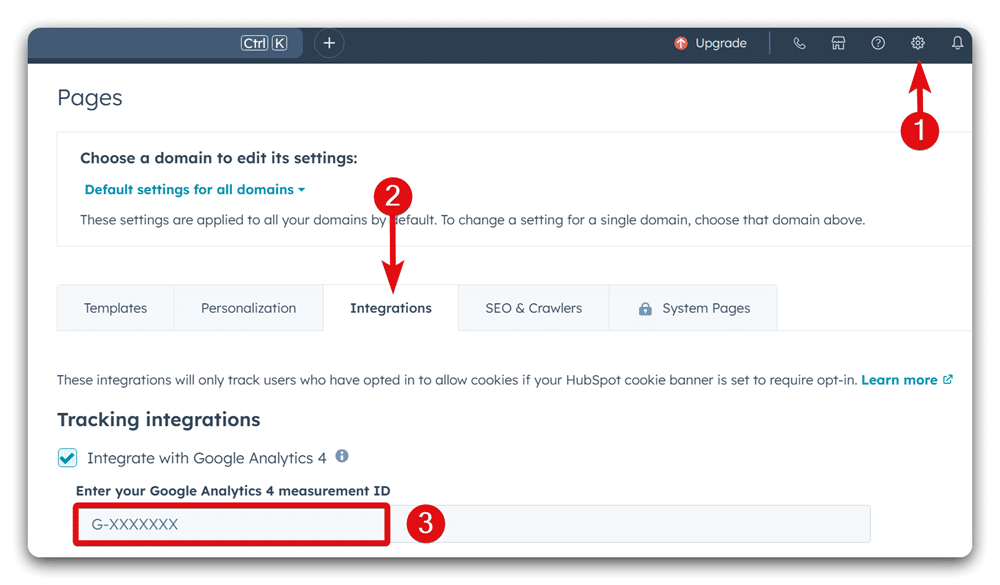
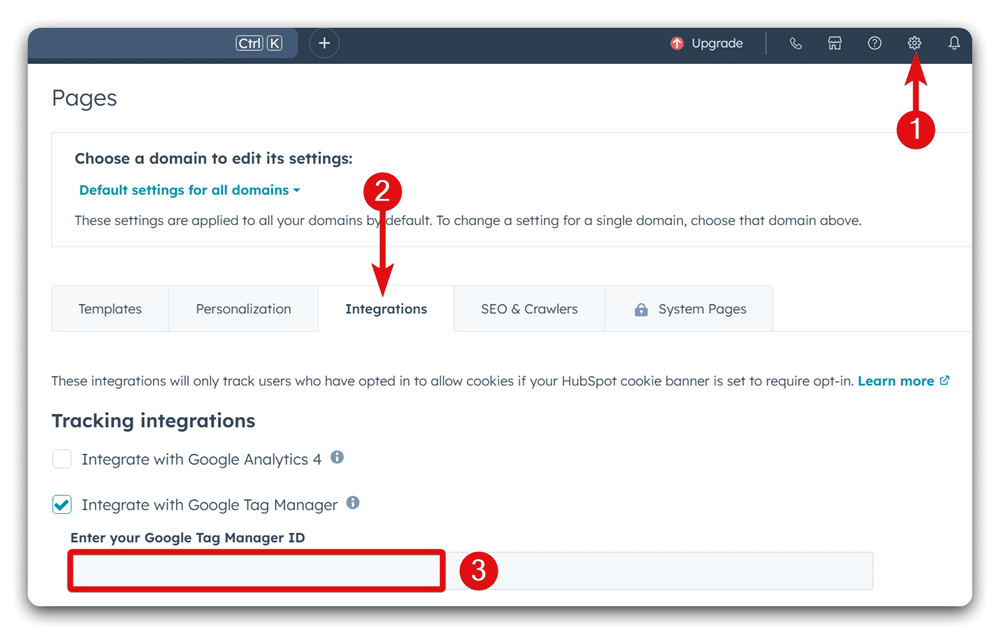
With your ID copied, head into HubSpot and choose ‘Settings’, then Website>Pages> Integrations. Paste your ID into the relevant section.
Integrating GTM with HubSpot
Luckily, finding your GTM ID within Google Tag Manager is simple. Just sign in to your GTM account and choose your container. The ID is easily visible from the top right of your workspace. It’s a string of characters beginning with ‘GTM’ to the left of ‘Preview’. Select this.
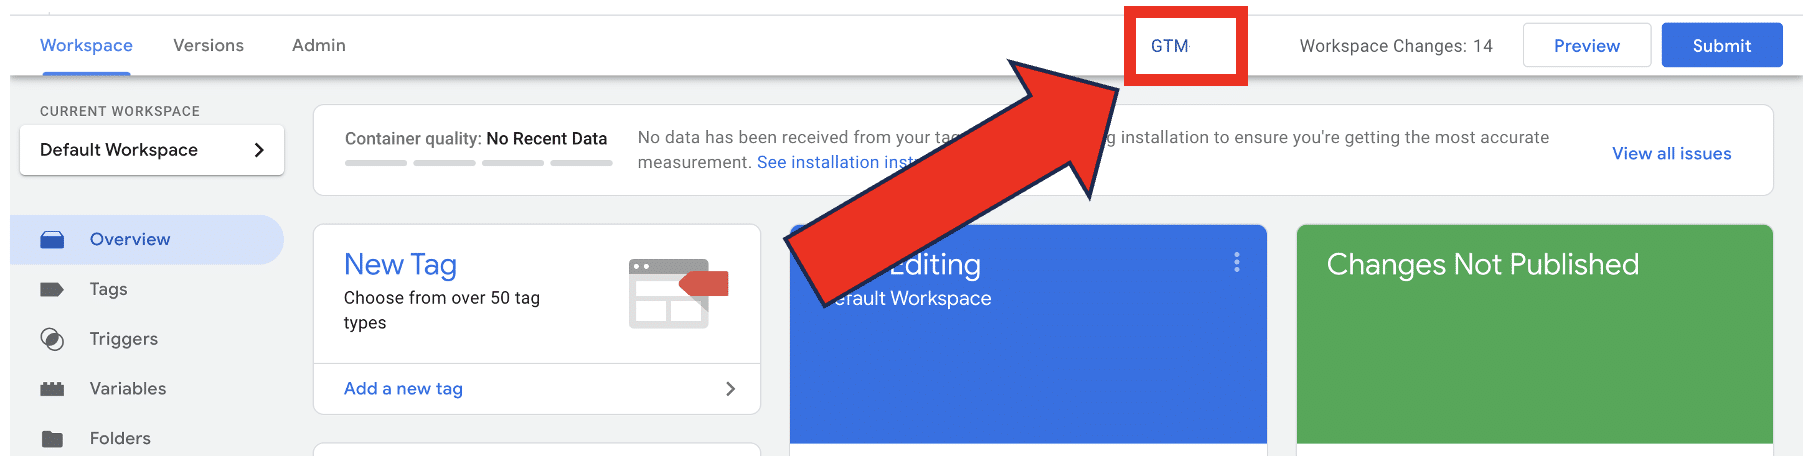
From the following window, you’ll see two large boxes full of code. You can easily copy and paste your ID from either of these boxes.
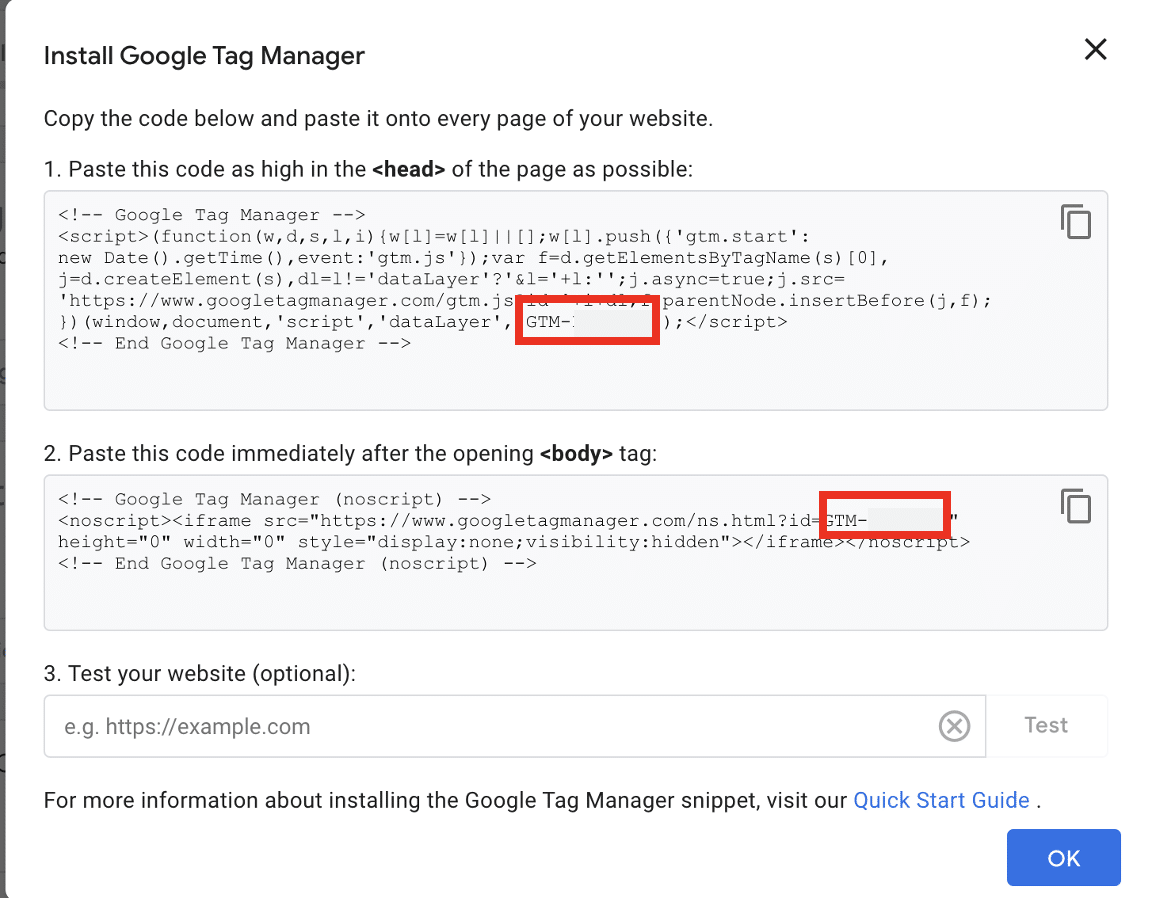
From your HubSpot account, once again choose Settings>Website>Pages> Integrations. Paste your ID into the relevant section.
Setting up the HubSpot Cookie Banner
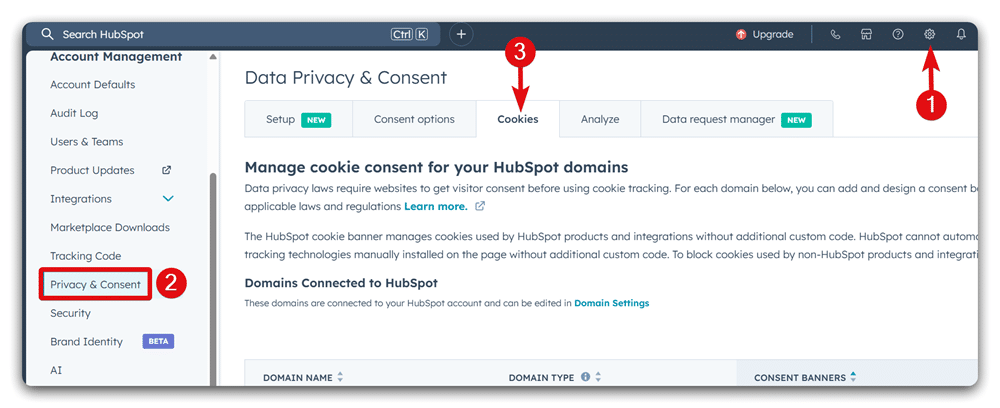
With both GA4 and GTM integrated with HubSpot, the only remaining stage is to set up a cookie banner. Luckily, HubSpot’s built-in banner can be set up in a matter of minutes. Just head to ‘Settings’ from the top navbar and then choose Privacy & Consent from the left sidebar. Then, click the Cookies tab.
Now, click the “Add external domain” from the next window & enter the domain name from the pop-up window.

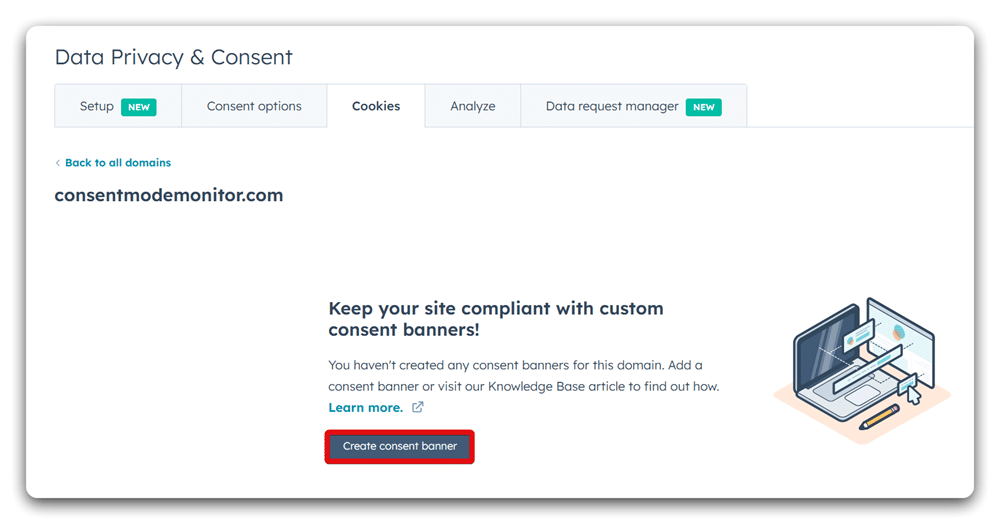
From the next window, select the “Create consent banner” button.
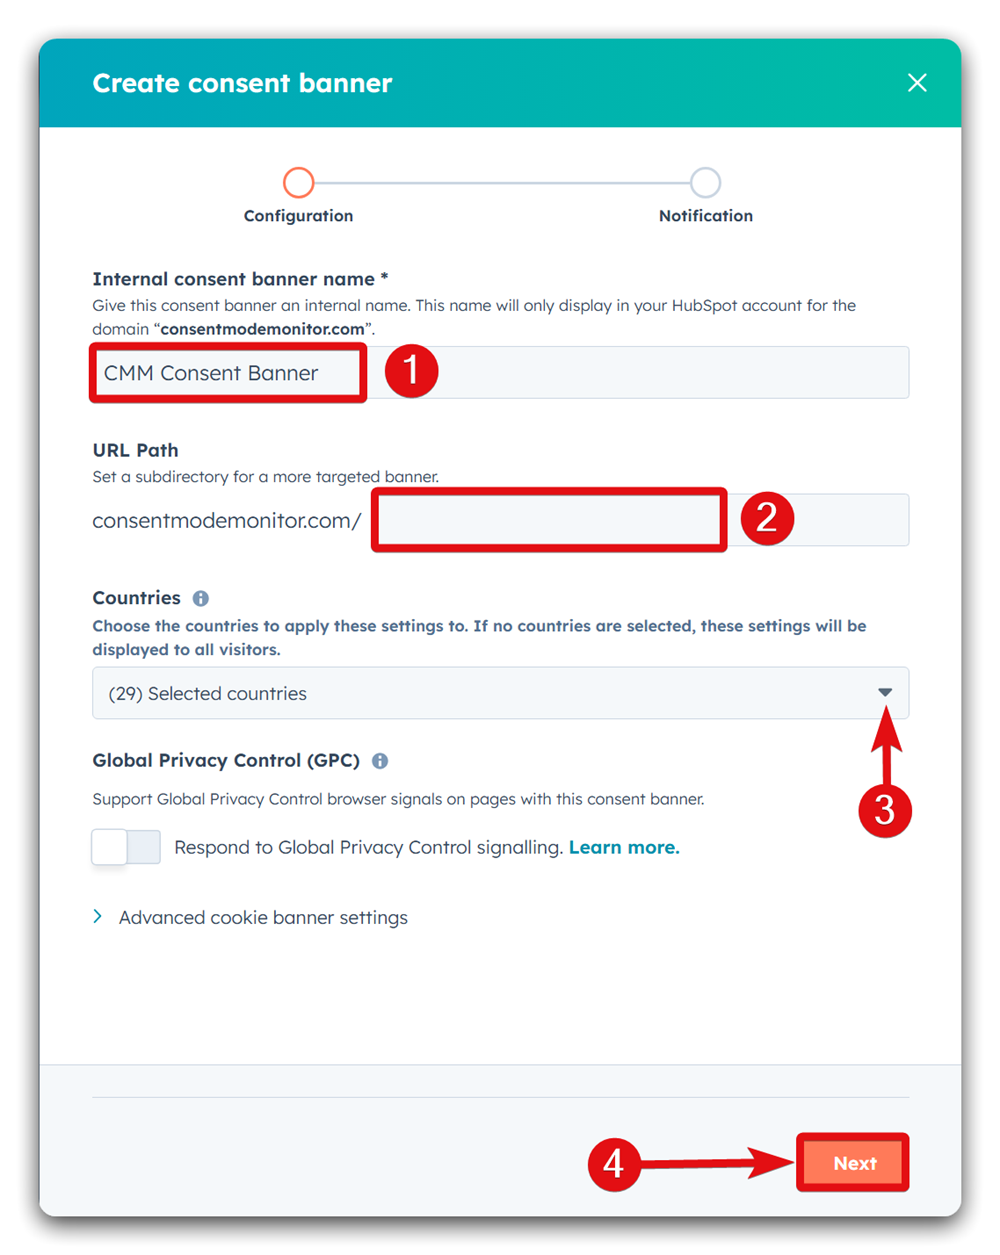
On the Configuration page, start by assigning an internal name to your banner. If you want the banner to appear only on a specific page, enter its URL under “URL Path.” Leave this field empty to apply the banner site-wide.
Next, under the “Countries” section, pick all members of the European Union, the European Economic Area, and the United Kingdom. When you’re done, click Next.
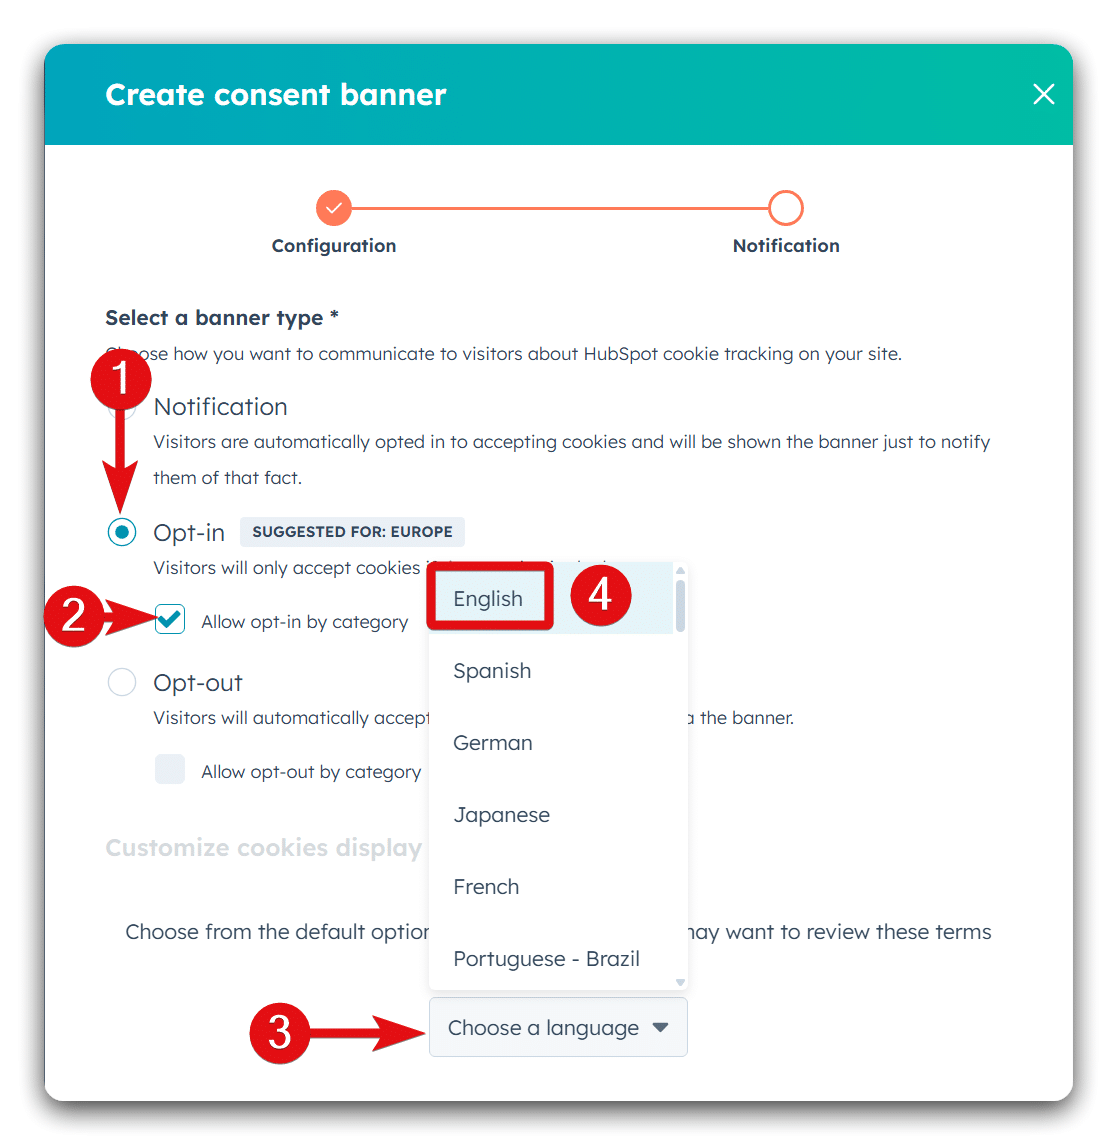
On the next screen, select “Opt-in” to ensure cookies activate only after visitors give consent. Enable “Allow opt-in by category” so users can choose specific cookie types. Finally, pick the banner’s language. For this guide, we’ll stick with the default language, English.
After selecting your banner language, “Consent banner content” and “Consent categories content” dropdowns will appear below the cookie settings. Use them to adjust text, button labels, and category details. When you’re ready, click Publish to activate your banner.

Once you’ve completed all the above steps, HubSpot Consent Mode V2 will have been activated successfully on your site. Well done!
Integrating with Consent Mode manually
Integrating Consent Mode directly through HubSpot is the simplest method. There are, though, some reasons why you might opt to handle the process manually. Listed below are some of the reasons you might need to take a manual approach.
- You use an external provider for your cookie banner on HubSpot.
- You use the HubSpot consent banner on an external website.
- You have set up GTM server-side tracking.
Don’t worry if you fit into any of the above categories. Here’s how you can manually set up HubSpot Consent Mode V2. You can still manually implement Google consent mode v2.
Activate HubSpot Consent Mode V2 Today
There’s no escaping the fact that if your business operates online, it must comply with data privacy legislation. Obtaining user consent is an essential part of this process. Luckily, HubSpot already does half of the work for you, thanks to its inbuilt cookie consent banner.
Google Consent Mode can work with your cookie banner to ensure compliance. What’s more, it can be set up for your HubSpot website in a matter of minutes. So, why not follow our step-by-step guide to get started? With HubSpot Consent Mode V2 active on your site, you can put your compliance worries to one side.