How to Activate Google Consent Mode V2 on Shopify

Google Consent Mode V2 plays a big role in keeping your website compliant with data privacy laws, so it’s something Shopify store owners shouldn’t ignore. Here, we’ll walk you through how to activate Google Consent Mode V2 on Shopify and ensure a smooth, hassle-free setup.
What is Consent Mode V2?
Google Consent Mode is a tool that works with Google tags to ensure tracking only kicks in when a user has explicitly given their consent.

Consent Mode V2 is the latest version of the tool. While it’s a new version in title, very little has changed from the original Consent Mode. The main difference is the addition of two new fields:
- ad_personlization= allow downstream remarketing usage.
- ad_user_data= allows email or mobile numbers in downstream usage.
Consent Mode V2 alone isn’t enough to be compliant. You also need a compliant cookie banner to register whether a user accepts or rejects cookies. Consent Mode won’t work without a cookie banner.
Is Google Consent Mode working on my store?
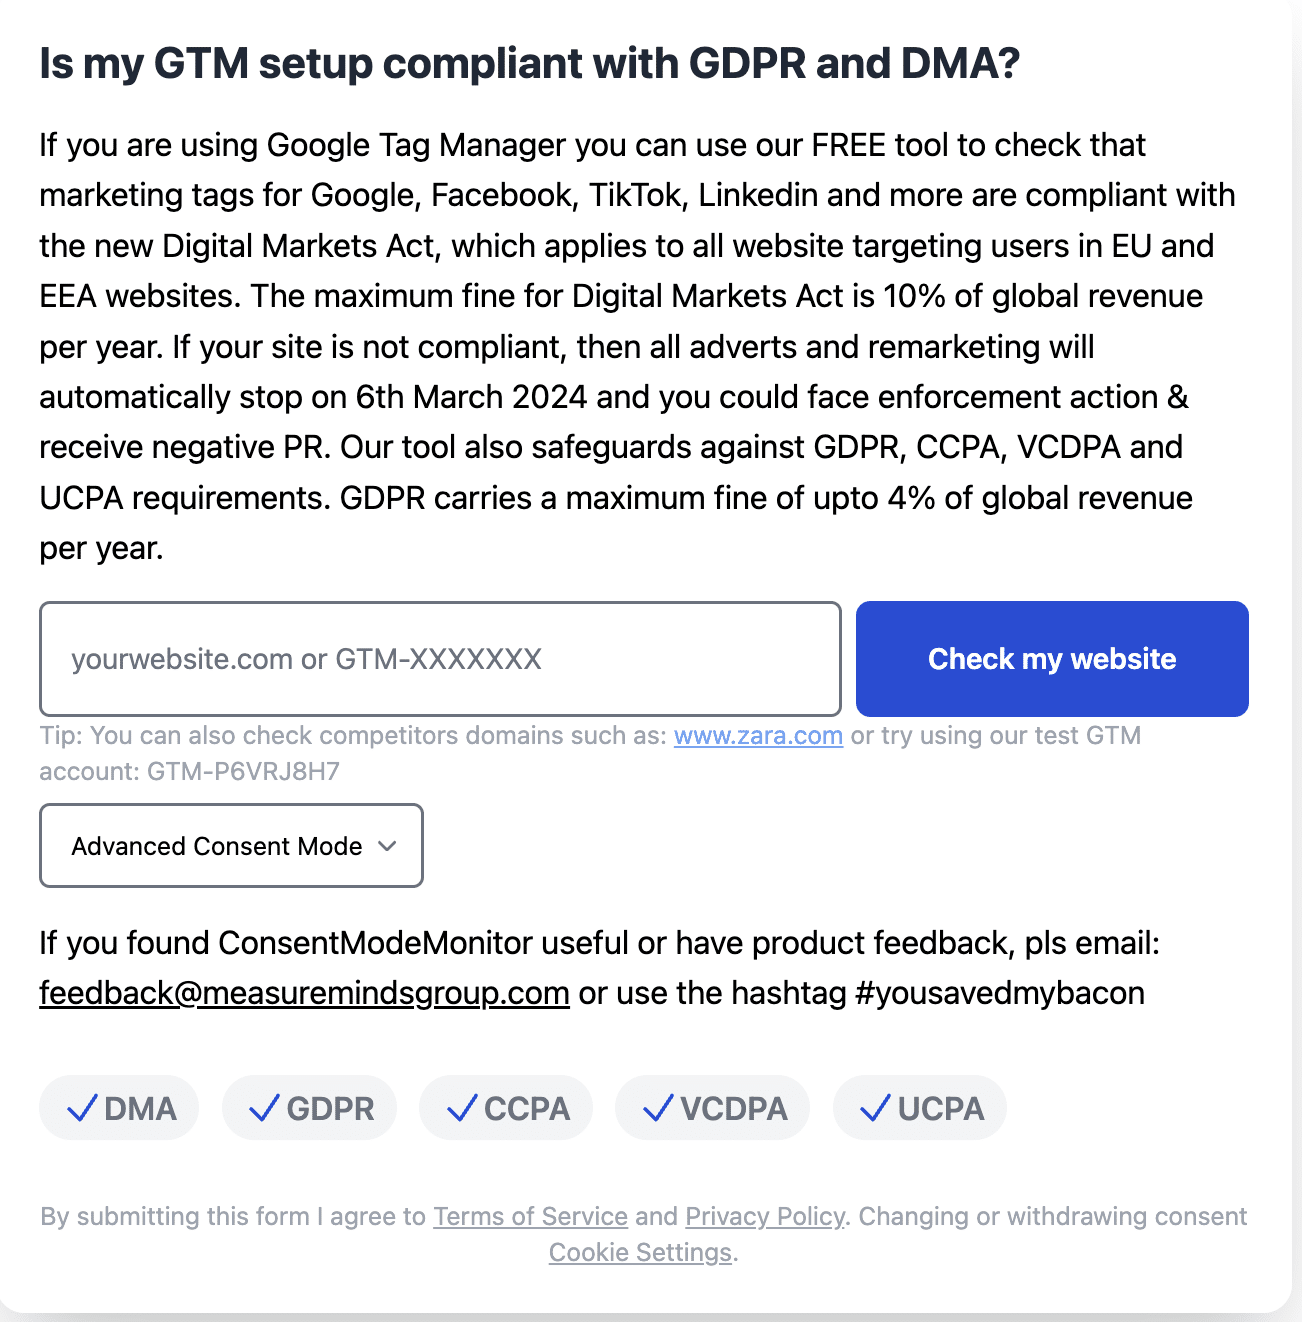
To check if Shopify Consent Mode V2 is active on your site, you can use MeasureMinds’ Consent Mode Monitoring tool. This analyses your GTM setup and identifies any potential issues.
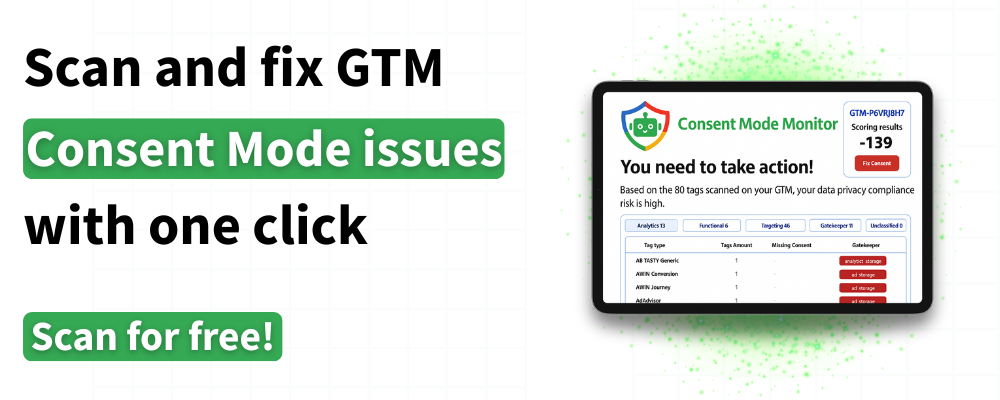
Non-compliance with GDPR and DMA can lead to fines of up to 4% of your global revenue. The consent mode monitoring tool is a quick and easy way of staying in line with the law.
How to activate Shopify Consent Mode V2?
Consent Mode is a crucial tool. Luckily, the task of implementing Shopify Consent Mode V2 can be accomplished in a few simple steps.
You’ll need a cookie banner for Consent Mode to work. The simplest method for finding a cookie banner is to use Shopify’s built-in solution, a free option that can be enabled from Store Settings>Customer privacy>Activate cookie banner.
However, the default option is very basic, and not enough to ensure you are compliant.
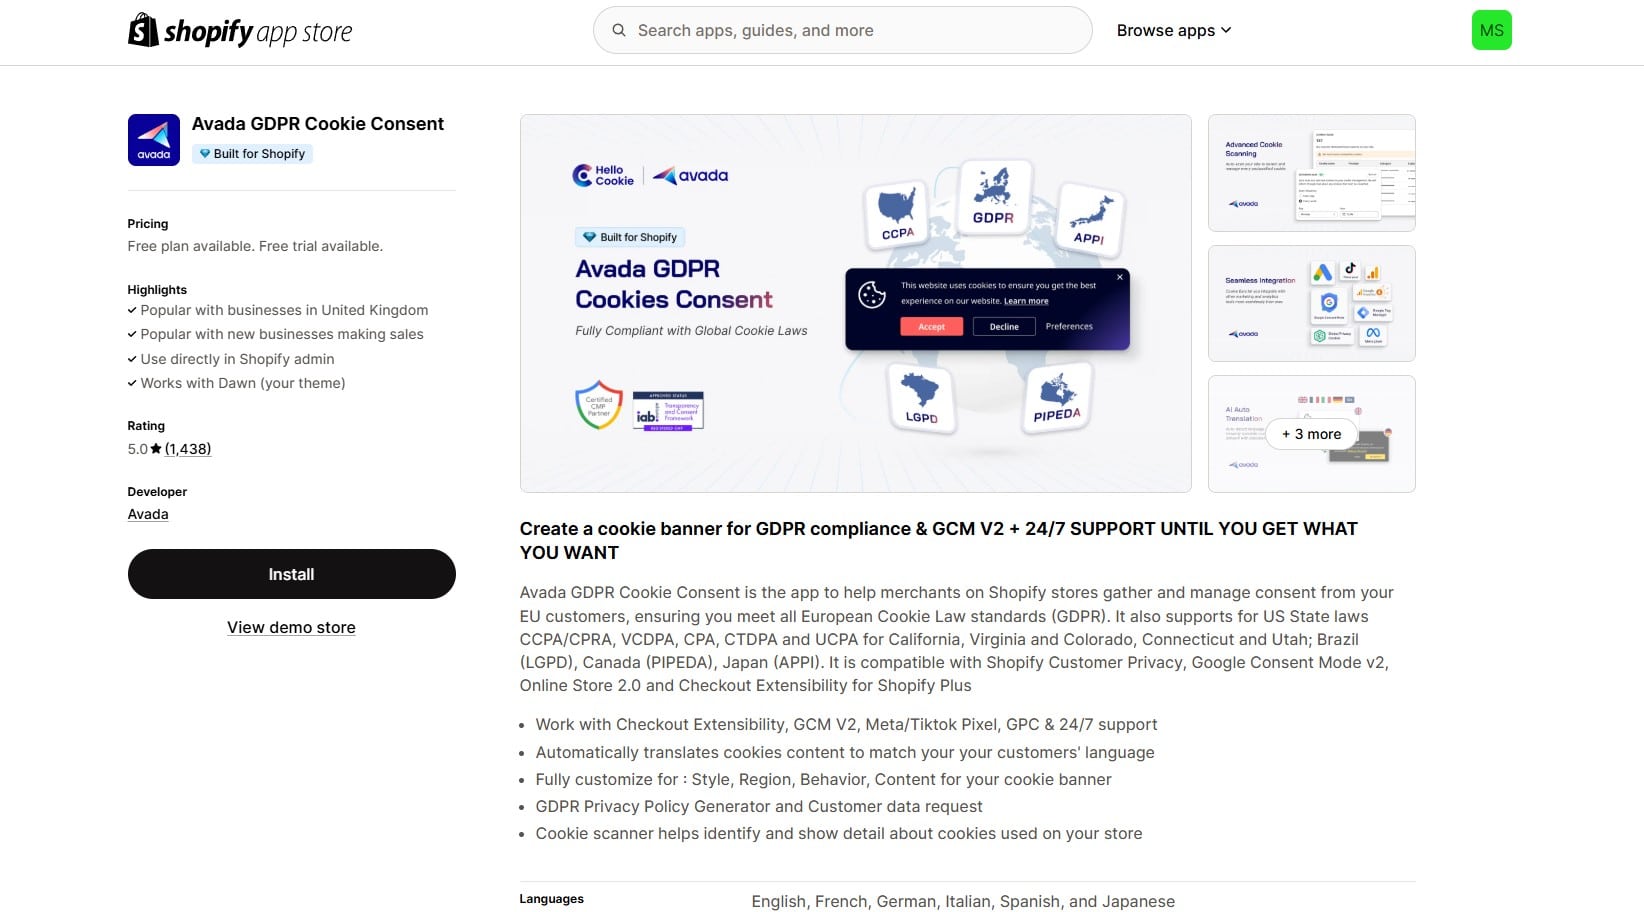
If you want to ensure compliance, the best bet is to use a third-party cookie banner. These are called Consent Management Platforms (CMPs).
How to set up a Consent Management Platform (CMP)
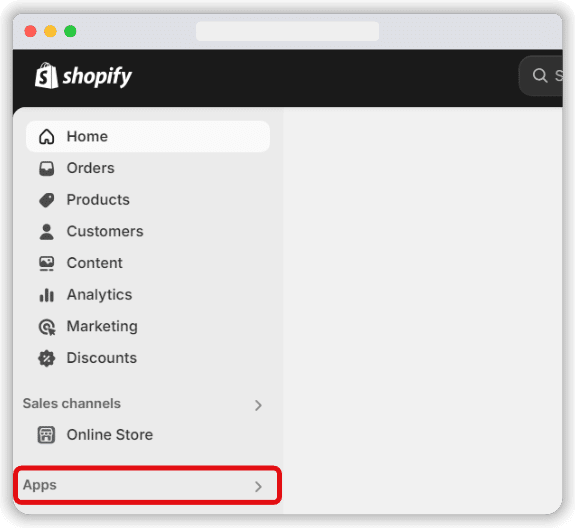
Step 1: Go to the Shopify App Store
Head to the Shopify App Store. To do so, head to the Shopify admin page, and choose ‘Apps’.
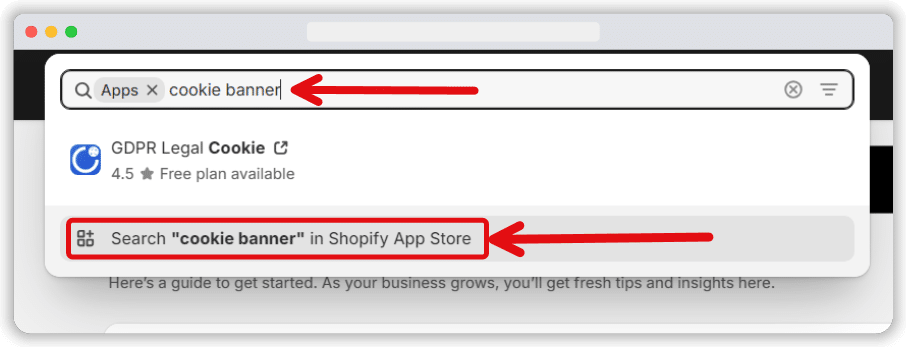
Step 2: Search for your preferred CMP provider
Enter ‘cookie banner’ in the search bar & search the Shopify app store for that keyword. You should see a list of free options, alongside some that require a subscription, and will offer features such as advanced customisation. Choose the option that best suits your needs.
We have a guide on choosing and setting up a CMP, but we recommend Cookiebot. We have a 20% Cookiebot discount code available for you if you’d like to use it.
Note: There is no ‘standard solution’ that fits all businesses. Every Shopify site will have unique requirements. Consider design and functionality requirements and choose the best option for you.
Step 3: Install your CMP
Once you’ve found the best option select ‘Install’. This will take you to an OAuth page, where you’ll need to choose ‘Install App’.
After your app is installed, you will need to customise the cookie banner, and in some cases, create an account.
Most cookie consent apps on Shopify will give you the option to add a link to your privacy policy, and even disable the banner for specific countries.
In most cases, you simply need to click a button in the Shopify app settings to enable the cookie banner. Additionally, you’ll need to make sure that Consent Mode is enabled in your cookie banner, this is usually a quick setting which simply needs to be turned on.
If you would prefer to either create your own cookie banner or have a professional create one for you, things can get a little more complicated.
While it is possible to build your own cookie consent banner on Shopify, it requires extensive knowledge of HTML and JavaScript, which is why it’s best left to experts.
If you’re willing to invest the time and money into having one built, it can save you on subscription fees, while also ensuring you get a cookie banner built to match the design and features you need, leading to a better user experience.
There are benefits to both options, but the bottom line is that using an app is easier, but can come with subscription fees, while creating your own banner can offer flexibility while being difficult to implement. This could cause compliance issues if not set up correctly.
Integrating with Shopify Consent Settings
Now that you’ve chosen your cookie banner, you need to integrate it with Shopify’s consent settings. For this, you’ll need a code snippet ending with Shopify.JS. This should be provided by your user consent solution.
Step 1
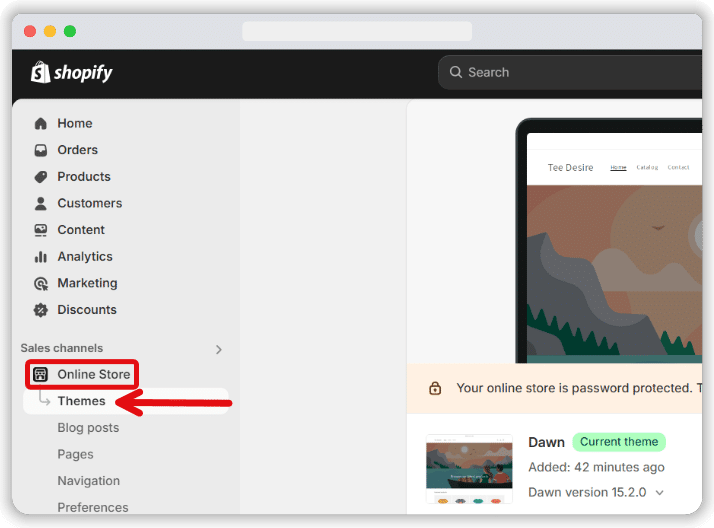
To begin, choose ‘Online Store’ from your Shopify admin. Then, select ‘Themes’ from the dropdown menu.
Step 2
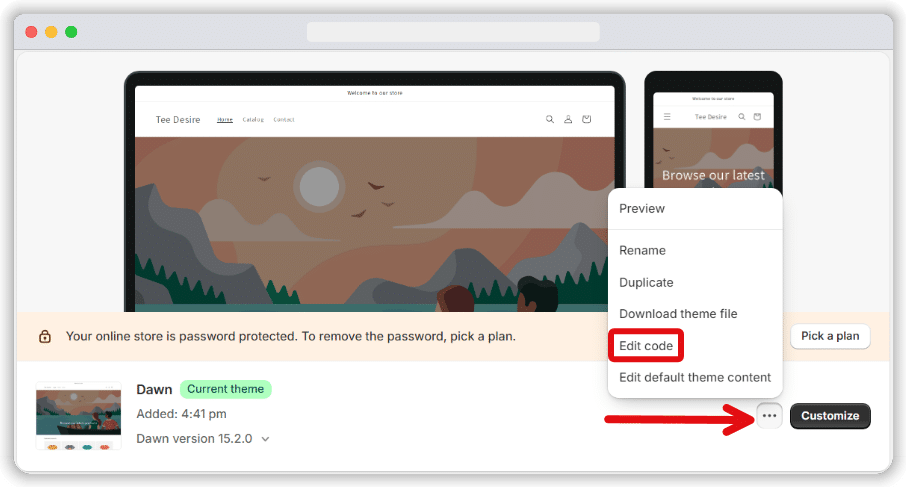
Click the three dots in the top-right of your screen – next to your current theme and to the left of ‘Customise’. A drop-down menu should appear – select ‘Edit Code’.
Step 3
You’ll now have access to your site’s code. On the left of your screen, you’ll see an area marked ‘layout’. Select this, and then click ‘theme.liquid’ from the dropdown menu,
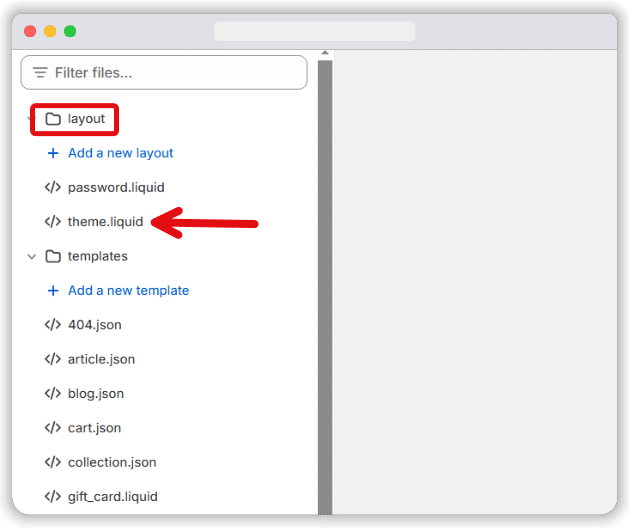
Paste your code ‘Shopify.JS’ code into the line directly after <head>.
Enabling Shopify privacy settings
With the Shopify.JS code in place, it’s time to enable Shopify’s privacy settings.
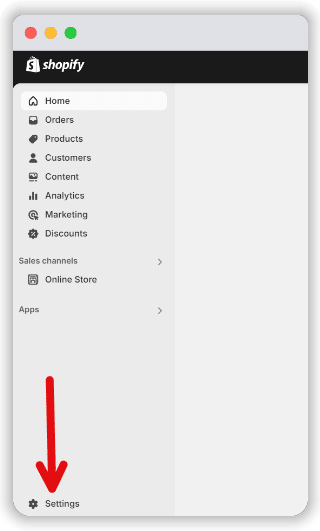
Step 1
Head to the store settings section from your Shopify admin.
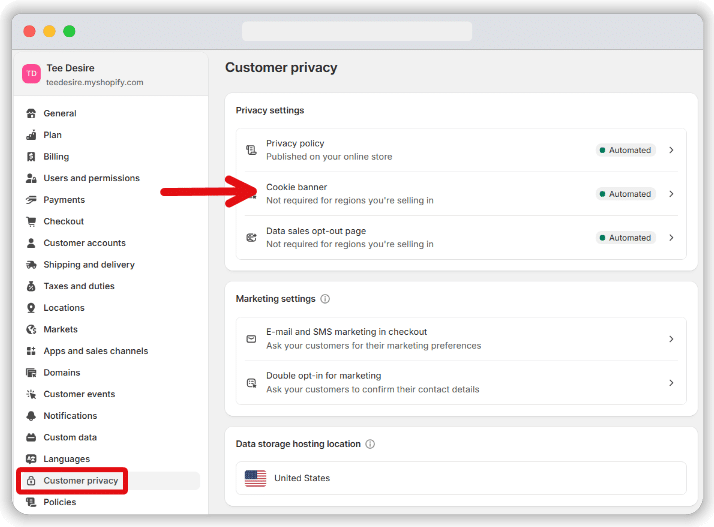
Step 2
From the left of your screen, look for ‘Customer privacy’. Click on that & from the next screen select “Cookie banner” option.
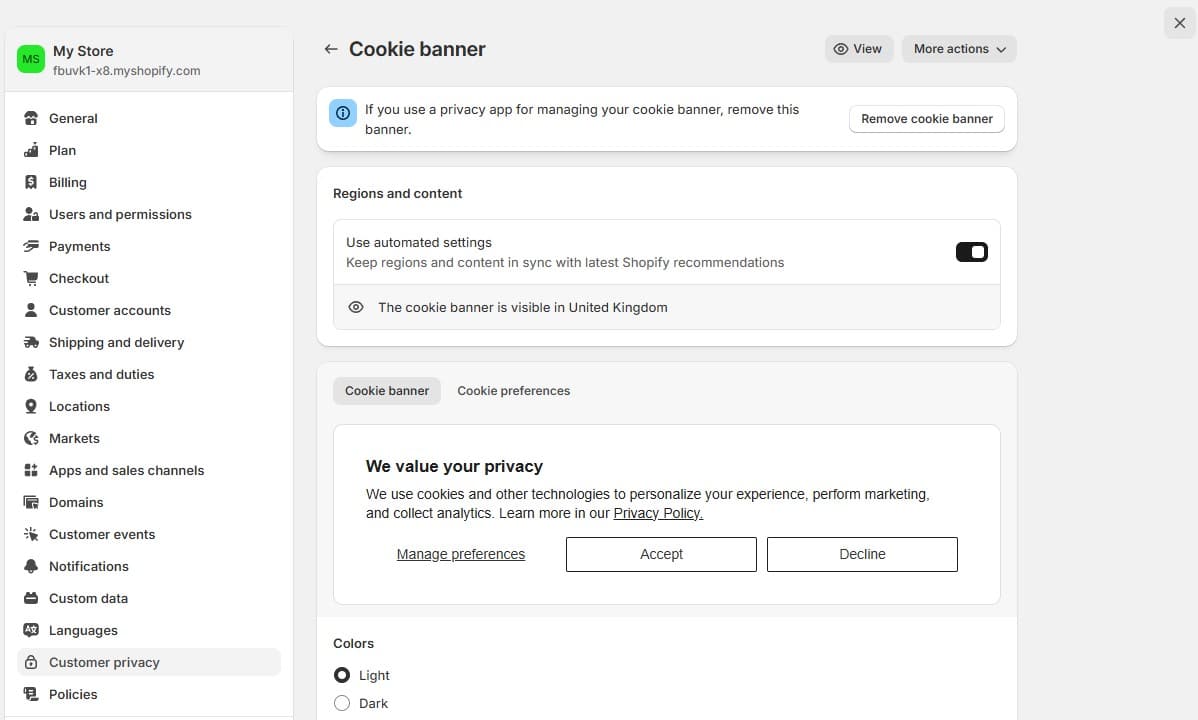
Then, choose ‘Remove cookie banner’ from the next screen, if you’re using a third-party banner, otherwise, simply make sure Shopify’s built-in cookie banner is active.
Step 3
Lastly, you’ll need to choose the regions where you’re happy for Shopify to collect customer data. Take care when choosing this option, as any mistakes could lead to non-compliance.
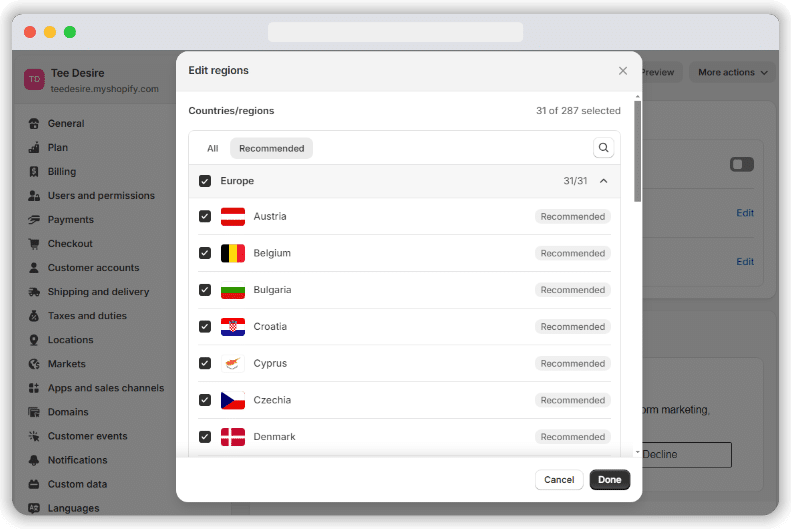
If you’re using a third-party privacy app for your cookie banner, you will need to go to the app’s settings to select which regions you want the banner to show on.
And there you have it! Your cookie banner is set up.
Implementing Consent Mode
With your cookie banner active, it’s time to implement Shopify Consent Mode V2. Follow the steps listed below to do so:
Step 1
Firstly, you’ll need to create a Google Tag Manager Account and set up GTM on your site.
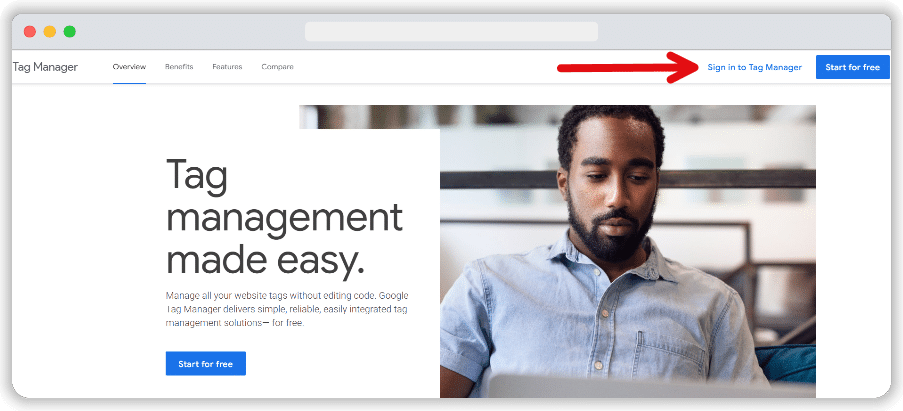
If you haven’t already done so, you will need to set up a GTM account.
Step 2
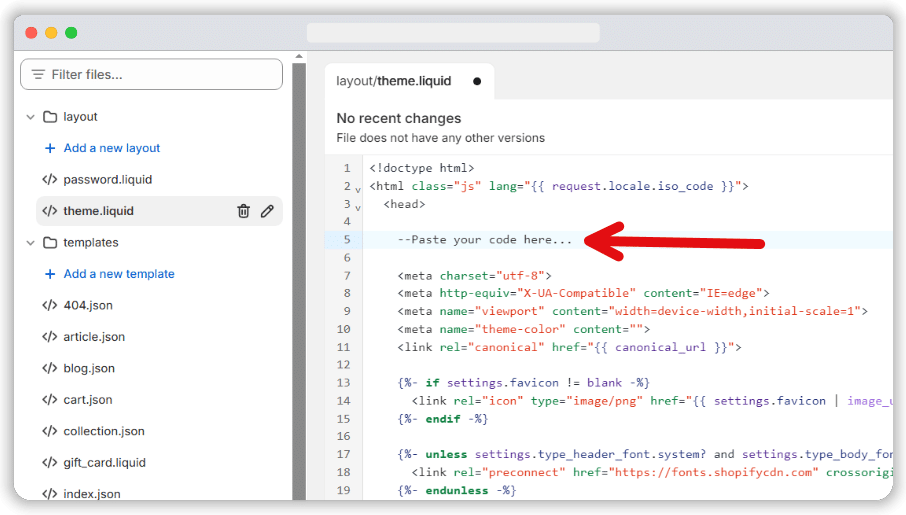
With your GTM account created, you’ll need to return to the theme.liquid section of your store’s code.
Paste the following code, after the <head> section. This ensures that Google Consent Mode kicks in before any other tracking code on your site, such as Shopify Analytics, Google Analytics, or Google Ads.
{% render 'gcm-integration-script' %}![]()
![]()
Step 3
Locate the folder labeled ‘Snippets’ from the left of your screen, and create a new liquid file within this section labeled ‘gcm-integration-script.liquid’.
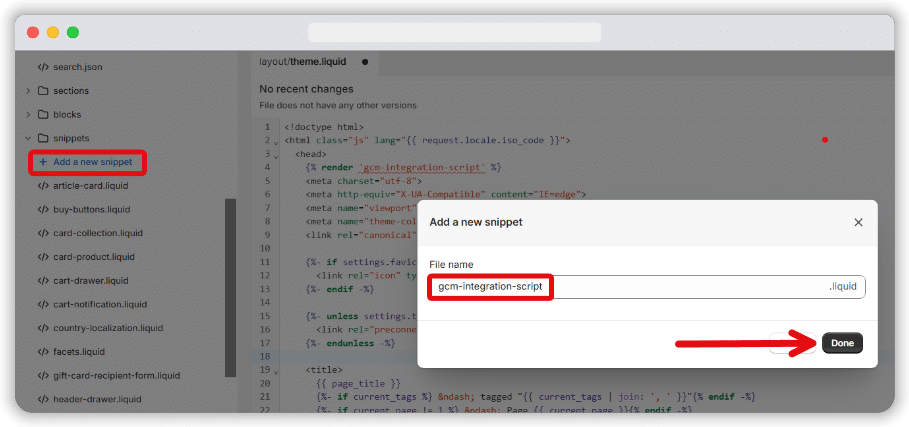
Step 4
Paste the integration script from your cookie banner solution into your new snippet.
And just like that, you’ve successfully set up Shopify Consent Mode V2 on your store. Well done!
Benefits of Shopify Consent Mode V2
Setting up consent mode on Shopify can take time, but if you want to make sure your site is compliant, it should be seen as a priority. Below are some of the reasons why consent mode is so important.
Ensure compliance with data privacy laws
It’s no surprise that the biggest benefit of consent mode is ensuring cookie compliance. With new guidelines and regulations constantly emerging, the tool helps you to stay ahead of the curve and reduce risks.
Improved customer trust
Data privacy has become a much bigger topic in recent years. Using Consent Mode ensures that customer’s choices are respected. They’ll feel more trust towards your business and be more likely to stick with you.
Data privacy is important for several reasons and that’s why it should be seen as a unique selling point (USP) for brands.
Ensures continued data collection
Without Consent mode, the only alternative is to cease all data collection on your site. The tool ensures you can continue to gather data in a legally compliant way. This means you can continue to offer personalisation and other features that enhance the user journey and improve marketing campaigns.
Enables upscaling
Normally, when users reject cookies you’d be cut off from all data relating to them. Thanks to Consent Mode Modelling, you can fill this data gap, enabling businesses to carry out accurate benchmarking.
Basic Consent Mode Vs Advanced Consent Mode
Google introduced two new versions of Consent Mode for V2 that introduce new settings. Each functions in slightly different ways.
Basic Consent Mode, blocks all Google tags before a user grants consent, while advanced Consent Mode grants the user more control over cookies and tags. This freedom enables businesses to alter cookie and tag behaviour based on different regulations. This makes Advanced Mode a strong option for organisations operating in multiple markets.
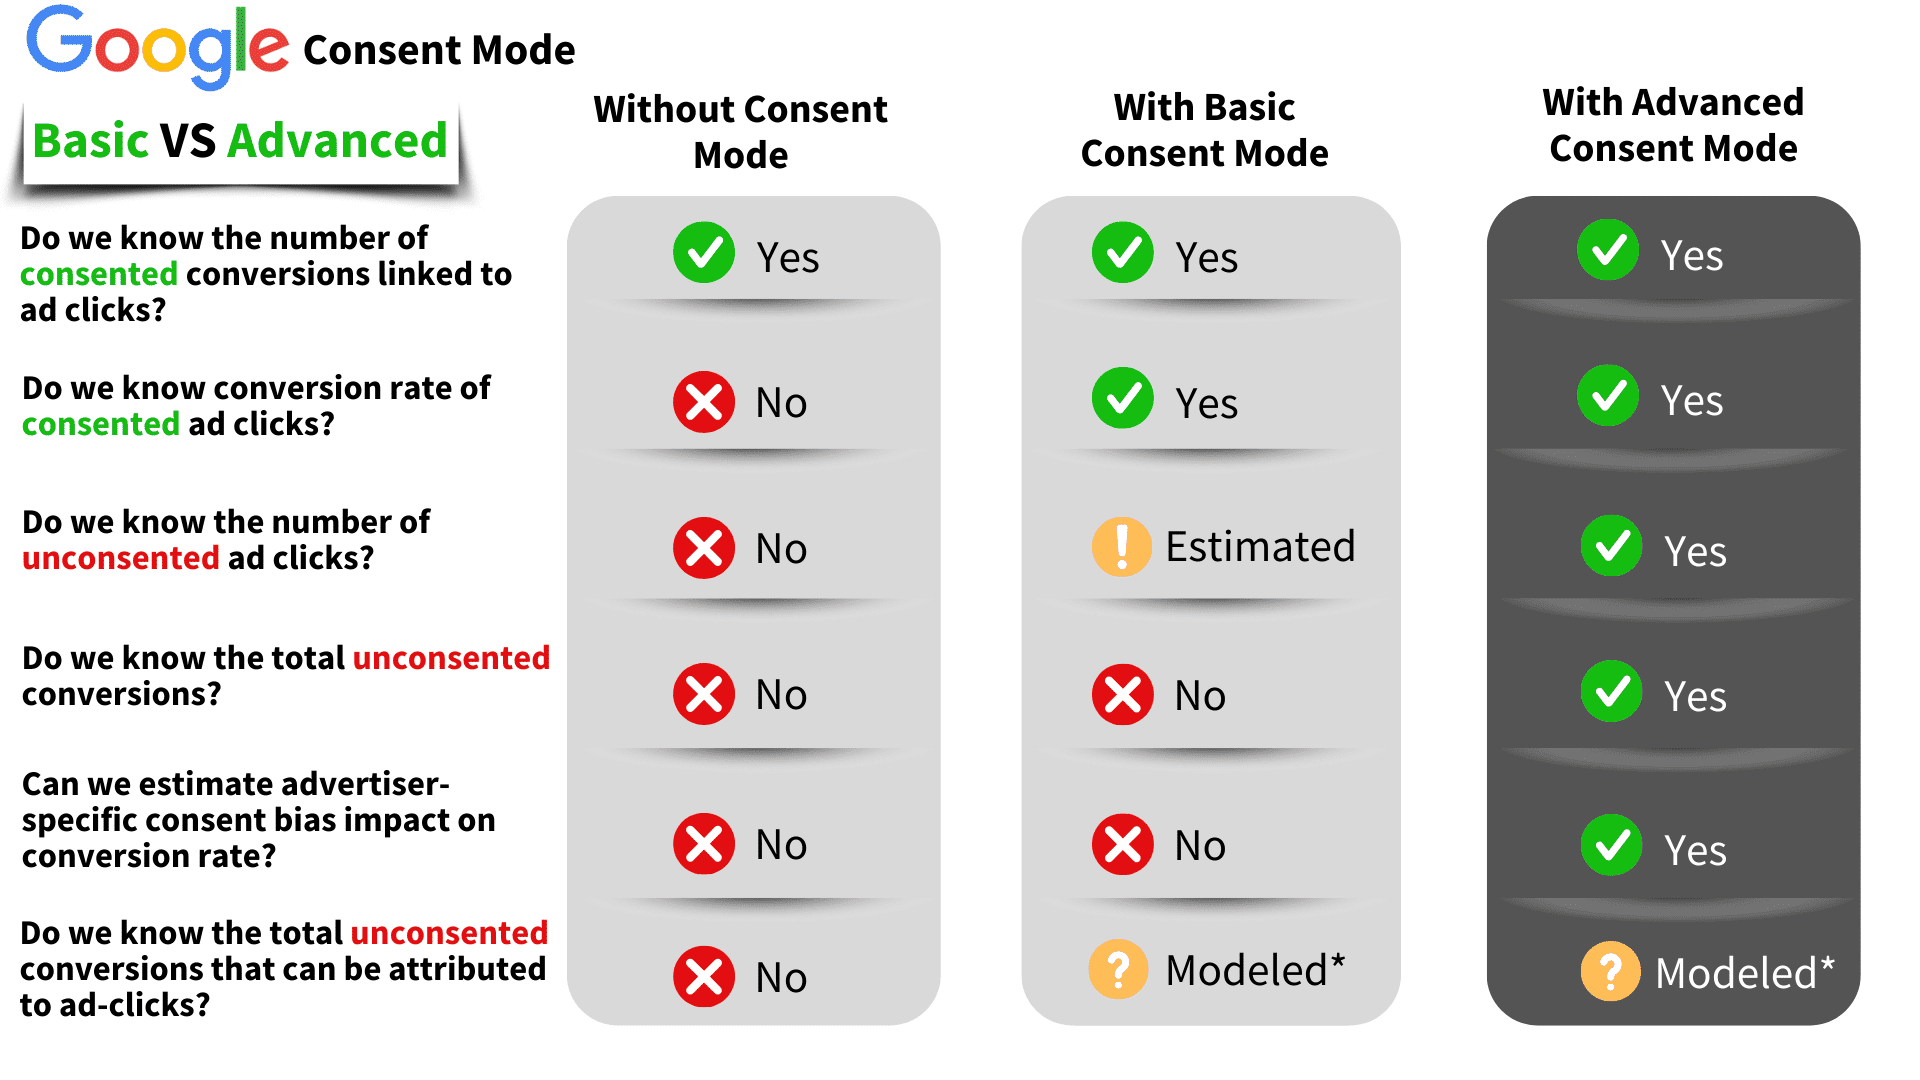
Another advantage of Advanced Consent Mode is that it provides more detailed upscaling. Basic Mode uses industry benchmarks to fill the gap when users reject cookies. Advanced Mode looks at data from your website directly, and uses deny pings to upscale.
Should I use Advanced Consent Mode or Basic Consent Mode?
Despite providing greater control, Advanced Consent Mode may pose a compliance risk. Advanced Mode sends cookieless pings to Google to upscale data. As this data comes from users who haven’t consented, it could lead to discrepancies with legislation and impact GDPR compliance.
However, there have been no fines issued as a result of using advanced consent mode and therefore no legal precedent has been set. Advanced consent mode is MUCH more useful than basic. Therefore we recommend using it but consulting with a DPO or lawyer for genuine legal advice.
Activate Google Consent Mode today!
Shopify Consent Mode V2 helps you stay on the right side of the law and reduce the risk of fines. What’s more, as we’ve explored, you can activate Consent Mode in a few simple steps.
Just remember, Consent Mode alone isn’t enough to ensure compliance. Be sure to set up a cookie banner solution that aligns with your organisation’s needs. Each banner works slightly differently, and will have slightly different integration steps – view your solution’s documentation for any unique requirements.